
Homemade Twinkies
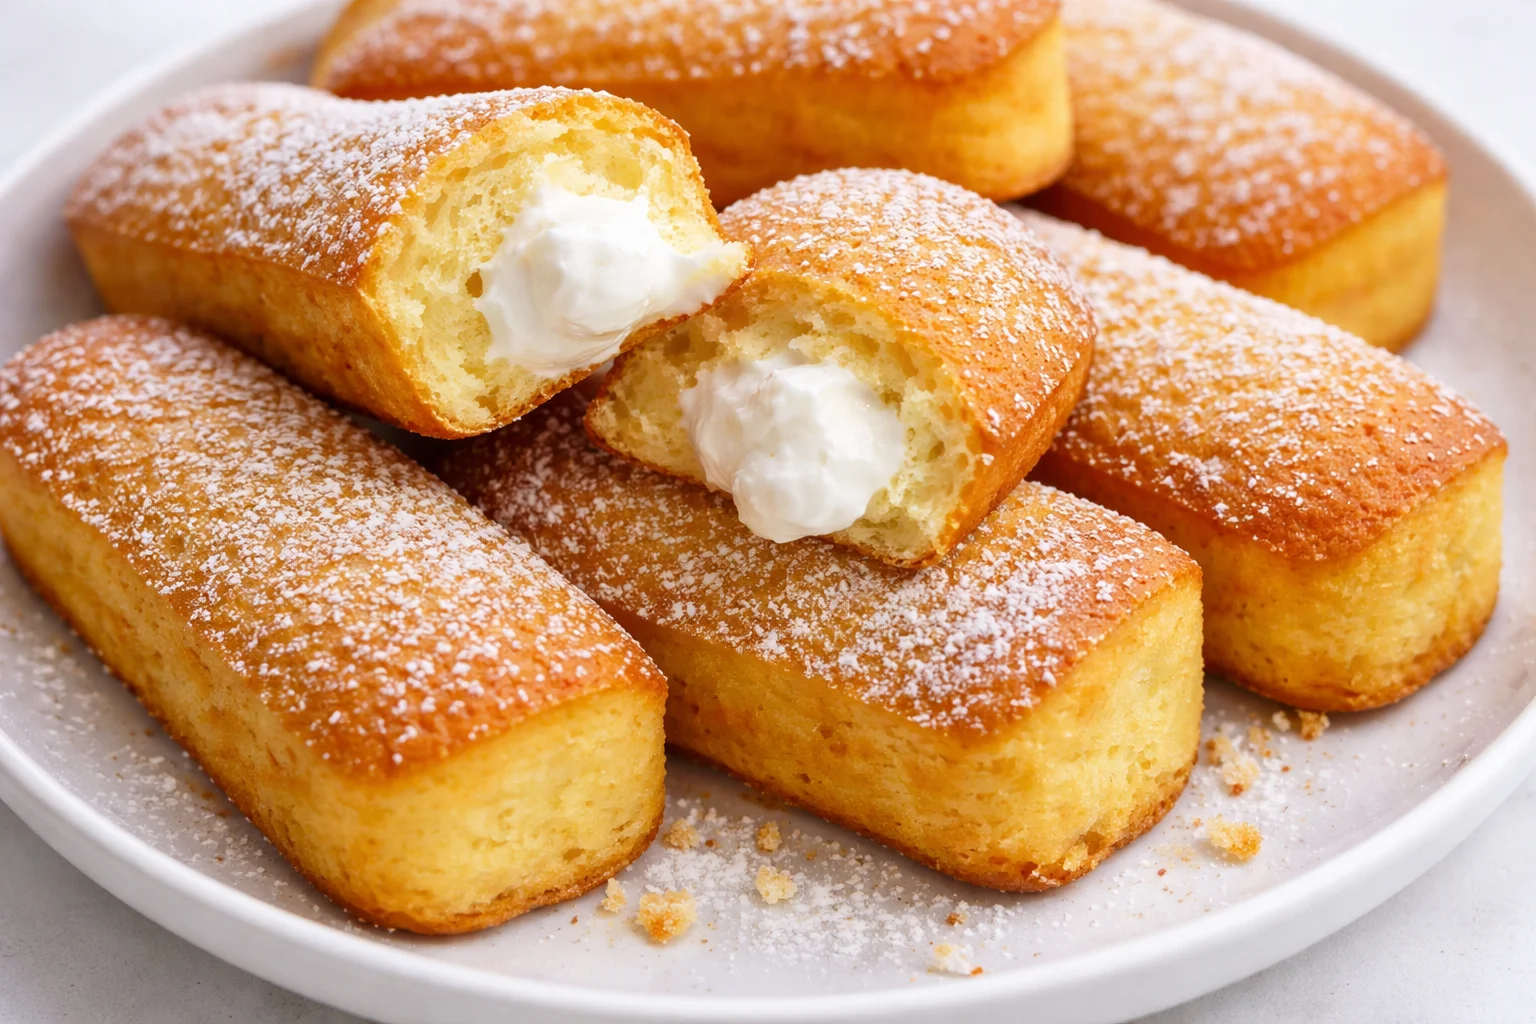
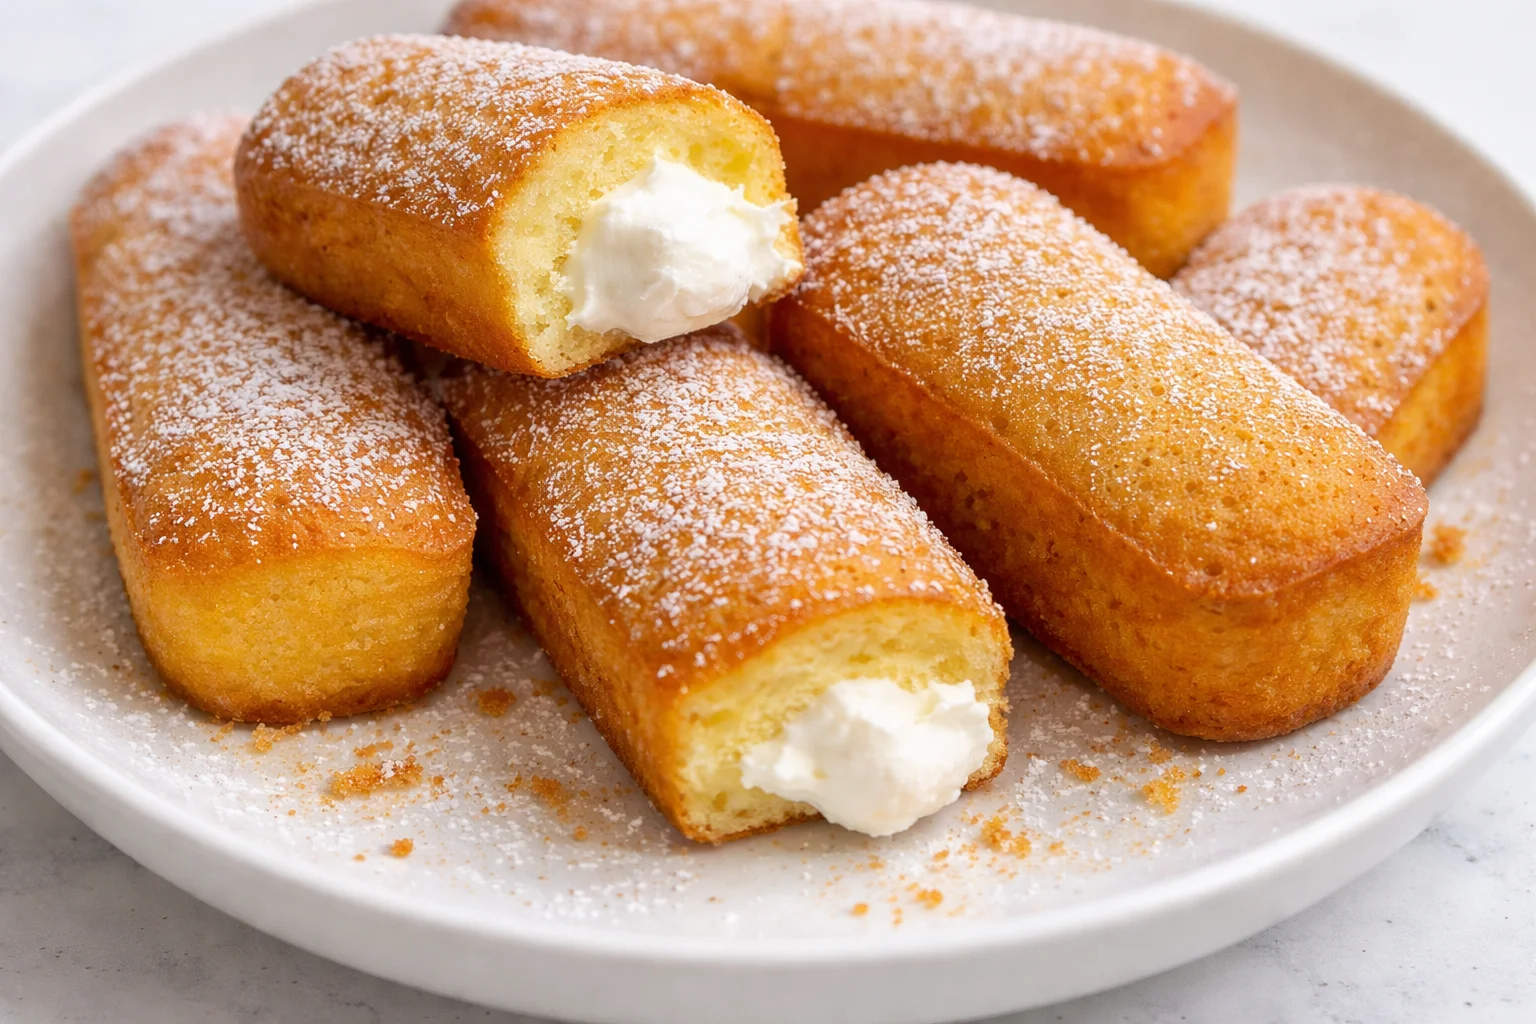
There’s a special kind of magic that happens in the kitchen when you’re creating something sweet and nostalgic. The joy of baking brings back memories of childhood afternoons spent savoring treats that seemed almost too good to be true. For many of us, Twinkies embodied that playful spirit, and making them at home takes that nostalgia to an entirely new level. Homemade Twinkies are not only delicious but also a labor of love that brings warmth to every bite. Imagine the sweet aroma wafting through your home, soft vanilla sponge cakes filled with fluffy cream, bringing smiles to the faces of your loved ones.
As we dive into this delightful recipe, you’ll quickly discover that whipping up your very own Homemade Twinkies is easier than you might think. With simple ingredients you likely have in your pantry, you can make a treat that rivals those childhood favorites. Join me in reliving those golden memories and creating new ones today with this fun and delicious recipe.
Kitchen Essentials You’ll Need
When it comes to baking, having the right tools can make all the difference. Here’s what you’ll need for your Homemade Twinkies:
- Twinkie pan: This unique pan gives your cakes that classic shape we all know and love.
- Mixing bowls: A couple of different sizes will help in combining your ingredients easily.
- Whisk: Great for mixing and adding air to your batter for that perfect sponge texture.
- Electric mixer: To cream the butter and sugar efficiently and achieve that fluffy texture.
- Piping bag: This is essential for filling the Twinkies with cream, ensuring each bite is wonderfully sweet.
Having these tools on hand will not only streamline your baking process but also help you achieve the best results. Trust me, you’ll want to savor every last bite!
Why You’ll Love This Recipe
Baking your own Homemade Twinkies is a delightful experience full of flavor, comfort, and creativity. These treats are more than just a snack; they are a celebration of soft, fluffy sponge and rich cream. When you bite into a freshly made Twinkie, you’ll experience:
- Flavor: Each sponge cake is light, airy, and has a subtle vanilla flavor that pairs perfectly with the creamy filling.
- Comfort: There is something about these little cakes that evokes happiness, reminding you of carefree childhood days.
- Convenience: With simple ingredients and straightforward steps, this recipe is perfect for both novice and experienced bakers. You can also easily double or halve the recipe to suit your needs.
- Customizability: Once you master the technique, feel free to experiment with flavors. Whether it’s adding chocolate or even a hint of lemon, the possibilities are endless.
This recipe combines ease and charm that will captivate your loved ones and even surprise yourself. You’ll be amazed at how replicate something so iconic can bring joy to your day.
Homemade Twinkies Ingredients
To prepare your delicious Homemade Twinkies, gather the following ingredients:
- 1 cup all-purpose flour
- 1 teaspoon baking powder
- 1/2 teaspoon salt
- 1/4 cup unsalted butter, softened
- 1/2 cup sugar
- 2 large eggs
- 1 teaspoon vanilla extract
- 1/2 cup milk
- 1 cup heavy cream
- 2 tablespoons powdered sugar
- 1 teaspoon vanilla extract (for filling)
With these ingredients in hand, you’re ready to create something truly special—perfectly fluffy and satisfying Twinkies that will fill your home with the aroma of fresh-baked goodness.
Step-by-Step Instructions
Here’s how to make your own Homemade Twinkies, with instructions that guide you through each step:
- Begin by preheating your oven to 350°F (175°C). While it’s heating, grease your Twinkie pan to ensure a smooth release once they’re baked.
- In a medium mixing bowl, whisk together the flour, baking powder, and salt. This step helps to evenly distribute the leavening agents throughout the flour.
- In another large mixing bowl, using an electric mixer, cream the softened butter and sugar together until the mixture appears light and fluffy, about 3–4 minutes.
- Add the eggs to the butter-sugar mixture one at a time, mixing well after each addition. Then, blend in the vanilla extract until fully incorporated.
- Gradually add the dry ingredients from the first bowl to the wet ingredients, alternating with the milk. Start and end with the dry ingredients, mixing until just combined and smooth.
- Carefully pour the batter into the Twinkie mold, filling each cavity about three-quarters full. This will allow plenty of room for rising without spilling over.
- Bake in the preheated oven for about 12-15 minutes. They are ready when they are golden and a toothpick inserted in the center comes out clean.
- Once baked, remove the pan from the oven and allow it to cool completely in the pan before transferring to a wire rack.
- For the filling, whip the heavy cream with powdered sugar and the additional vanilla extract until stiff peaks form. This will create the perfect light and airy filling.
- Using a piping bag fitted with a long tip, gently fill the cooled sponge cakes with the whipped cream, giving each one a generous filling.
- Finally, serve your homemade Twinkies to family and friends. Enjoy every delicious bite!
Fun Variations You Can Try
Once you’ve mastered the classic recipe, feel free to let your creativity run wild. Here are some fun variations you can try:
- Chocolate Twinkies: Substitute half of the all-purpose flour with cocoa powder for a rich chocolate sponge. Pair it with a chocolate cream filling for a decadent twist.
- Minty Fresh: Add a few drops of mint extract to the cream filling for a refreshing flavor that’ll take your Twinkies to the next level.
- Fruit-Filled: Incorporate pureed berries into the cream for a fruity twist. Strawberry or raspberry would complement the vanilla beautifully.
- Dairy-Free Options: Use coconut cream for the filling and almond milk for the batter to accommodate dietary preferences without sacrificing flavor.
- Flavorful Additions: Consider mixing in citrus zest, like lemon or orange, into the batter for a delightful fresh note.
Each of these variations brings a unique spin to the classic homemade Twinkies that everyone can enjoy!
How I Love to Serve It
Serving Homemade Twinkies is all about comfort and joy. I love to plate them up as a sweet surprise for gatherings or enjoying a cozy afternoon treat. Here are some of my favorite serving moments:
- On a Dessert Platter: Arrange several Twinkies on a decorative platter with fresh berries and sprigs of mint for a colorful presentation. It’s an eye-catching centerpiece for any gathering.
- With a Side of Hot Chocolate or Coffee: Pair these sweet delights with a steaming cup of cocoa or coffee for the ultimate indulgent experience. The creaminess of the filling complements the warmth of your drink perfectly.
- With a Scoop of Ice Cream: For a decadent dessert, serve each Twinkie alongside a scoop of your favorite ice cream. Vanilla or chocolate ice cream adds an extra layer of delight!
- As a Weekend Breakfast Treat: Why not enjoy them for breakfast? Serve them with a side of fresh fruit and a drizzle of maple syrup for a special morning.
Every bite of these delectable treats reminds you that goodness can be simple and full of love.
Helpful Tips from My Kitchen
Baking can be a journey of discovery, especially with a recipe as beloved as Homemade Twinkies. Here are some helpful tips to enhance your baking experience:
- Room Temperature Ingredients: Ensure your butter and eggs are at room temperature before mixing. This helps create a smoother batter and better texture.
- Don’t Overmix: Once all the ingredients are combined, avoid overmixing to maintain the lightness of the batter. Mix just until no dry streaks remain.
- Check for Doneness: Since ovens can vary, start checking your Twinkies a few minutes early. Look for them to be golden brown and springy to the touch.
- Cooling Time: Be patient and let the cakes cool completely in the pan. This helps them firm up and makes filling easier.
- Filling Technique: For perfect filling, press the tip of the piping bag into one end of the Twinkie and fill slowly to allow the cream to fill the cavity without overflowing.
With these tips in your back pocket, you’ll feel confident navigating the sweet path of baking!
Important Cooking Reminders
When it comes to making your own Homemade Twinkies, here are some important reminders to keep in mind:
- Always preheat your oven to ensure consistent baking results and don’t skip greasing the pan.
- Monitor bake times closely. Overbaking can lead to dry cakes, so keep an eye out as they approach the end of the suggested time.
- For storage, keep your homemade Twinkies in an airtight container at room temperature for up to 3 days or refrigerate for longer freshness.
- When reheating, do so gently in the microwave for a few seconds to avoid drying them out. Enjoy warm for that freshly baked taste.
- Common mistakes to avoid: Overmixing the batter and not letting the cakes cool completely before filling can lead to less-than-perfect results.
Following these reminders will set you up for success!
Nutritional Information (Estimated)
Indulging in Homemade Twinkies can be a delightful experience, but it’s always good to know what you’re enjoying. Here’s a rough estimate of the nutritional breakdown per serving:
- Calories: Approximately 200
- Carbohydrates: 26g
- Fat: 10g
- Protein: 3g
Keep in mind that these values can vary depending on specific ingredient brands and serving sizes.
Recipe Details
- Prep Time: 20 minutes
- Cook Time: 15 minutes
- Total Time: 35 minutes
- Yield: About 12 Twinkies
Common Questions You Might Have
Can I make these Twinkies gluten-free?
Absolutely! You can substitute the all-purpose flour with a gluten-free blend. Just ensure that it has a one-to-one substitution ratio.Can I use other fillings besides whipped cream?
Yes, you can fill them with flavored creams, fruit preserves, or flavored curds! Get creative, and choose whatever suits your taste!How can I keep these Twinkies fresh for longer?
Store them in an airtight container at room temperature. For extended freshness, you can refrigerate them or even freeze some for later enjoyment.
Conclusion
Baking Homemade Twinkies is more than just following a recipe; it’s about creating moments filled with sweet nostalgia and joyful laughter. When you take that first bite, you’ll remember the carefree days of youth, and suddenly, everything feels right in the world. The soft, airy sponge surrounding that luscious filling is a simple pleasure that can bring a smile to anyone’s face.
This journey of flavor and nostalgia in creating your very own Homemade Twinkies is one worth sharing, and I hope it brings warmth to your kitchen, just as it has to mine. As you indulge in these homemade treats, take a moment to relish the texture, the taste, and the memories each Twinkie provides. You have crafted something beautiful and special for yourself and your loved ones, and that’s truly magical. So gather your family, share these delightful creations, and reminisce about sweet moments gone by as you make new ones. You’ll see that food has a wonderful way of connecting us all, and with Homemade Twinkies, you’ll have a slice of comfort in every bite.
Print
Homemade Twinkies
- Total Time: 35 minutes
- Yield: 12 servings 1x
- Diet: Vegetarian
Description
Delicious homemade Twinkies filled with fluffy cream, evoking childhood nostalgia.
Ingredients
- 1 cup all-purpose flour
- 1 teaspoon baking powder
- 1/2 teaspoon salt
- 1/4 cup unsalted butter, softened
- 1/2 cup sugar
- 2 large eggs
- 1 teaspoon vanilla extract
- 1/2 cup milk
- 1 cup heavy cream
- 2 tablespoons powdered sugar
- 1 teaspoon vanilla extract (for filling)
Instructions
- Preheat your oven to 350°F (175°C) and grease your Twinkie pan.
- In a medium mixing bowl, whisk together the flour, baking powder, and salt.
- In a large mixing bowl, cream the softened butter and sugar using an electric mixer until light and fluffy, about 3–4 minutes.
- Add eggs one at a time, mixing well after each addition, then blend in the vanilla extract.
- Gradually add the dry ingredients to the wet ingredients, alternating with milk, mixing until just combined.
- Pour the batter into the Twinkie mold, filling each cavity about three-quarters full.
- Bake in the preheated oven for about 12-15 minutes, until golden and a toothpick comes out clean.
- Cool completely in the pan before transferring to a wire rack.
- Whip the heavy cream with powdered sugar and additional vanilla extract until stiff peaks form.
- Fill the cooled sponge cakes with whipped cream using a piping bag.
- Serve and enjoy!
Notes
Store in an airtight container. Can be customized with chocolate or fruit fillings.
- Prep Time: 20 minutes
- Cook Time: 15 minutes
- Category: Dessert
- Method: Baking
- Cuisine: American
Nutrition
- Serving Size: 1 serving
- Calories: 200
- Sugar: 10g
- Sodium: 150mg
- Fat: 10g
- Saturated Fat: 6g
- Unsaturated Fat: 4g
- Trans Fat: 0g
- Carbohydrates: 26g
- Fiber: 0g
- Protein: 3g
- Cholesterol: 50mg
Keywords: twinkies, homemade dessert, nostalgic recipes, vanilla cake