
Introduction
There’s something undeniably cozy about the aroma of freshly baked scones gently wafting through the kitchen. As I mix the ingredients, I am transported back to warm afternoons spent with friends and family over tea. Each bite of a warm scone feels like a hug—soft, crumbly, and delightfully comforting. Making Irish Scones is a special ritual that I hold dear, blending simple ingredients to create something truly magical. These scones remind us of cherished moments, gatherings around the table, and the joy of sharing baked goods with those we love. Cozying up with a warm scone, perhaps with a smear of butter or a dollop of jam, is pure bliss that transports us to a different time and place. Let’s dive into why making these Irish Scones will become a beloved tradition in your home that you’ll want to share for years to come.
Kitchen Essentials You’ll Need
To create the perfect batch of Irish Scones, you’ll want to have a few essential tools in your kitchen. While the ingredients are key, having the right tools makes the process smoother and more enjoyable.
- Large mixing bowl: A sturdy bowl is essential for mixing dry ingredients and combining them with wet ones.
- Pastry cutter or fork: This is used to cut the butter into the flour, achieving that signature crumb texture.
- Rolling pin: While you might not need to roll the dough very thin, having a rolling pin can help shape it neatly.
- Baking sheet: A good-quality baking sheet is crucial. Parchment paper can help ensure your scones don’t stick.
- Cooling rack: Let your scones cool properly after baking to maintain their texture and flavor.
Having these tools will not only ease your cooking process, but they will also ensure those delicate scones come out perfectly.
Why You’ll Love This Recipe
The first bite of a freshly baked Irish Scone is like a warm embrace for your taste buds. You’ll find they’re a perfect blend of buttery richness and lightness, making them incredibly satisfying yet not overly heavy. The slight sweetness from the sugar adds just enough balance, while the optional raisins provide bursts of flavor that elevate the experience.
This recipe is simple but gratifying, showcasing how a handful of ingredients can create something so delightful. Whether it’s for breakfast, a tea party, or a simple snack, these scones adapt beautifully to any occasion. You’ll love how easy they are to whip up and how quickly they disappear once you set them out.
Key reasons to love this recipe include:
- Quick and easy: With minimal prep and cooking time, these scones are ready to enjoy in no time.
- Comfort food: They deliver that nostalgic comfort we all crave, perfect for those cozy moments at home.
- Customizable: With just a few tweaks, you can create variations that suit any taste.
- Versatile: They can be enjoyed plain, alongside savory dishes, or sweetened up with jams and cream.
Each time you bake these Irish Scones, they’ll bring joy and warmth to your home, making the effort truly worthwhile.
Irish Scones Ingredients
To make these delightful Irish Scones, gather the following ingredients:
- 2 cups all-purpose flour
- 1/4 cup sugar
- 1 tablespoon baking powder
- 1/2 teaspoon salt
- 1/2 cup unsalted butter, cold and cubed
- 1/2 cup milk
- 1 large egg
- 1/2 cup raisins (optional)
These ingredients blend seamlessly to create a scrumptious treat that’s rich yet light, sweet yet subtle. The use of cold butter is key, as it leads to fluffy, tender scones when baked.
Step-by-Step Instructions
- Preheat your oven to 400°F (200°C). The scent of warmth will soon fill your kitchen.
- In a large bowl, whisk together the flour, sugar, baking powder, and salt. This step combines the dry ingredients, creating a well-structured base for your scones.
- Cut in the cold butter using a pastry cutter or fork until the mixture resembles coarse crumbs, with small chunks of butter visible. You’ll feel the texture change, which is a sign you’re on the right track.
- In another bowl, whisk together the milk and egg until they are fully combined and look creamy.
- Pour the milk mixture into the flour mixture and gently stir until just combined. The dough may seem slightly sticky, which is perfectly fine.
- If you’re adding raisins, gently fold them into the batter now. Think of those little bursts of sweetness hidden inside each scone.
- Turn the dough onto a floured surface. You can feel the dough’s texture as you knead it gently a few times. Don’t over-knead; we want fluffy scones, not tough ones.
- Pat the dough into a circle about 3/4 inch thick. This thickness will ensure they bake perfectly without getting too dry or too doughy.
- Cut the dough into wedges. A sharp knife or pizza cutter can make this part easier. Watching those familiar shapes form is a delightful part of the process.
- Place the wedges on a baking sheet lined with parchment paper, leaving space between them to expand.
- Bake for 15-20 minutes, or until the tops are golden brown. As they bake, enjoy the mouthwatering aroma that fills your kitchen.
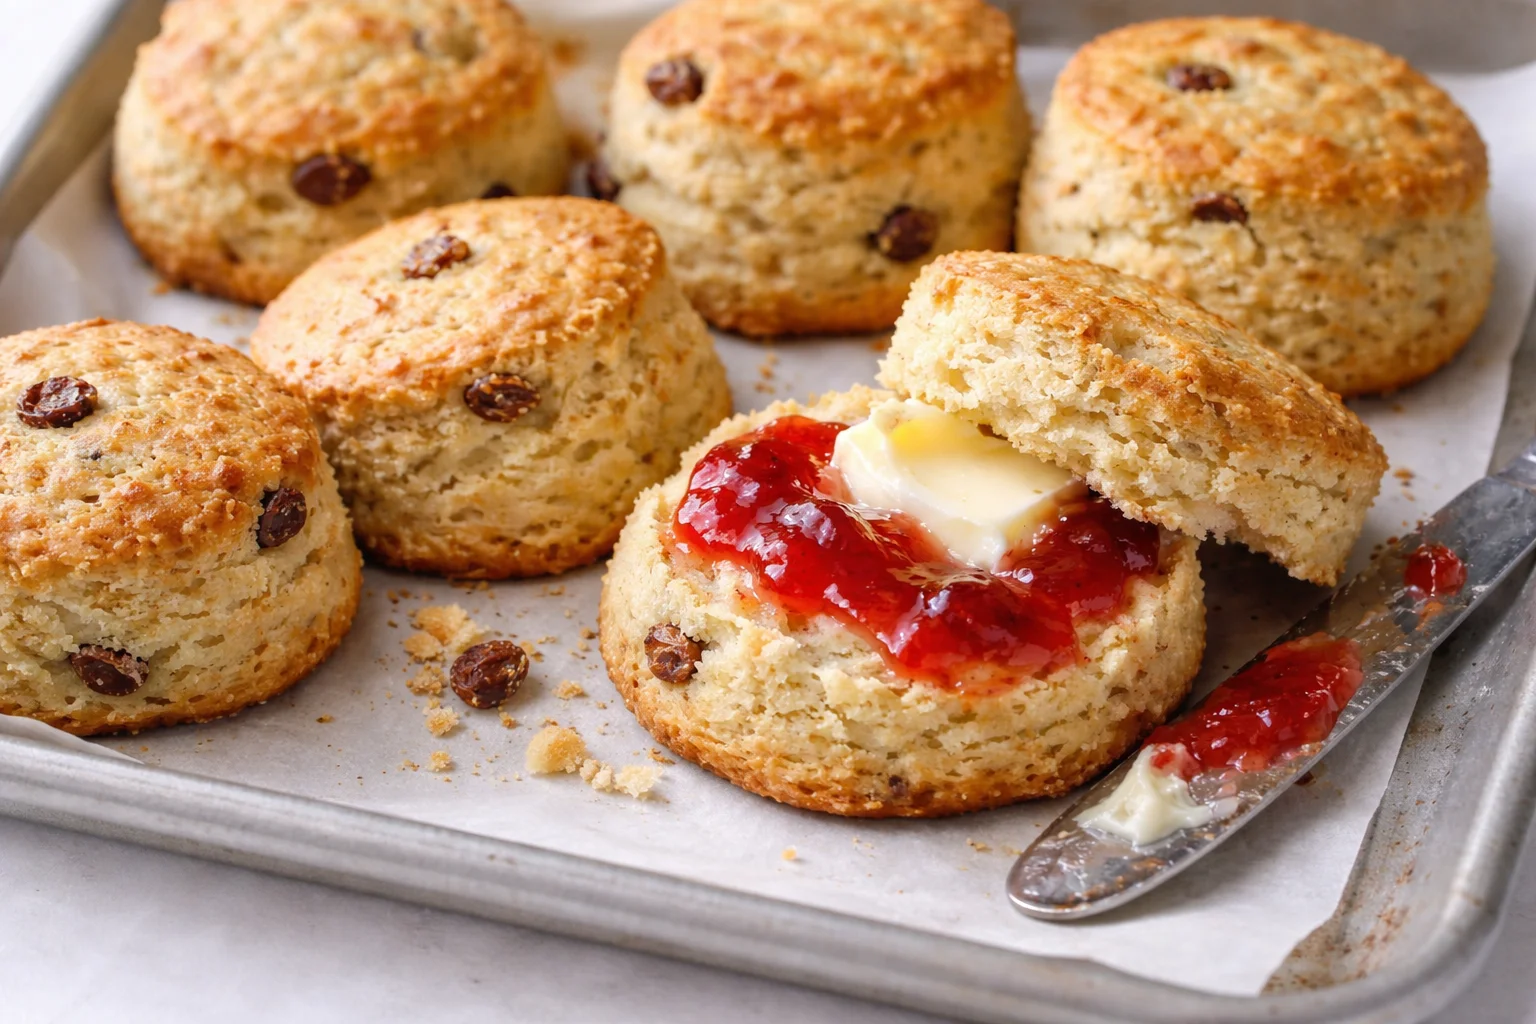
- Serve warm, with butter, jam, and cream for the ultimate indulgence.
Fun Variations You Can Try
Scones are a blank canvas for your creativity. Here are some variations to inspire you:
- Herbed scones: Add sharp cheddar cheese and fresh herbs like chives or rosemary for a savory twist.
- Citrus zest: Incorporate lemon or orange zest to give your scones a refreshing zing.
- Glazed scones: Drizzle icing made from powdered sugar and milk over the cooled scones for extra sweetness.
- Alternative add-ins: Try chocolate chips, cranberries, or nuts for different textures and flavors.
- Low-fat option: Substitute half of the butter with applesauce or Greek yogurt for a lighter version without compromising flavor.
These ideas can elevate your Irish Scones and make each batch unique and special.
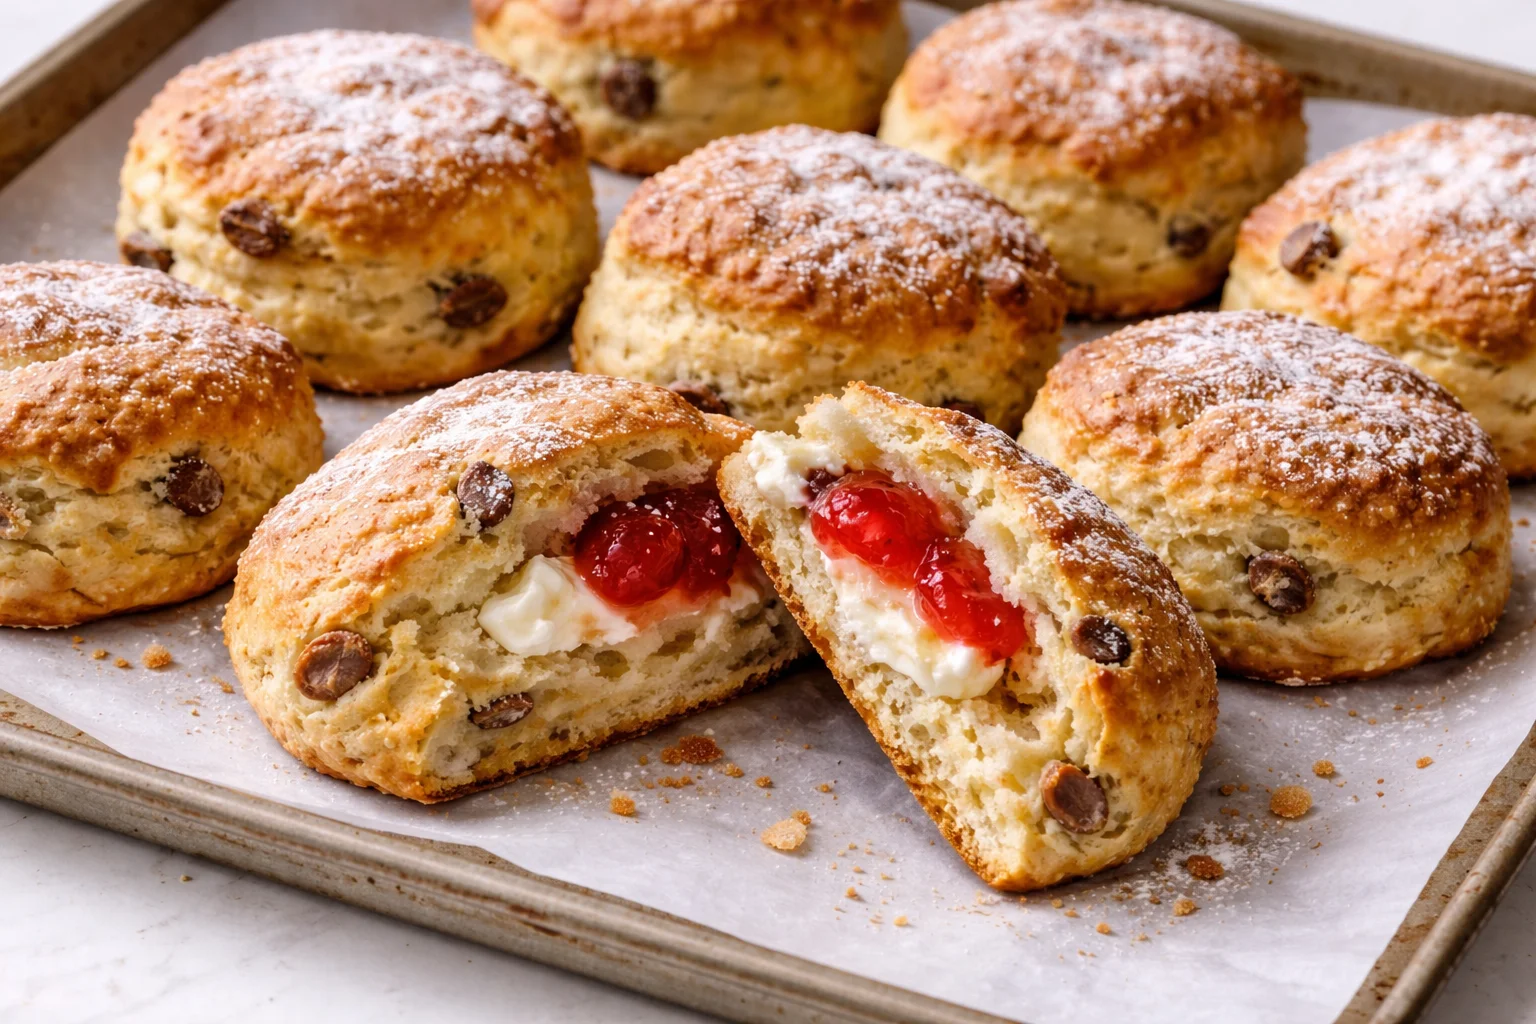
How I Love to Serve It
Serving Irish Scones can be just as delightful as making them. I like to present them warm on a beautiful platter, garnished with a light dusting of powdered sugar or a spoon of homemade jam. The scones look inviting, and their golden tops shine like sunshine.
A side of clotted cream or even whipped cream adds a luxurious touch. The rich, creamy element beautifully contrasts with the fluffy, crumbly texture of the scone. Pair your serving with a hot cup of tea or coffee for the perfect afternoon indulgence.
Imagine gathering friends or family around the table, everyone digging into the scones with laughter and joy. Or perhaps picture a quiet evening by the fireplace, savoring a scone all to yourself. Each serving creates an atmosphere filled with love and comfort, making these little treasures more than just a baked good.
Helpful Tips from My Kitchen
Here are some practical tips that have been lifesavers in my kitchen when making these delicious scones:
- Work quickly with butter: Keep your butter cold until you’re ready to use it. The colder the butter, the flakier your scones will be.
- Avoid over-mixing: Mix the dough just until combined. Overworking it can lead to dense scones.
- Use a kitchen scale: If you want to be precise with your flour measurement, using a scale can ensure accuracy.
- Try different types of flour: Experiment with whole wheat flour for a heartier texture or gluten-free flour for dietary needs.
- Refresh old baking powder: Before you start, check your baking powder’s freshness to ensure your scones rise perfectly.
These tips will help you achieve bakery-worthy scones right at home.
Important Cooking Reminders
- Ensure your baking powder is fresh; old baking powder may result in dense scones.
- Monitor the baking time closely as ovens can vary, and you want to avoid over-baking.
- Allow the scones to cool slightly on a rack to let them set properly.
- Store any leftovers in an airtight container for up to three days to maintain freshness.
- When reheating, warm in the oven at a low temperature; avoid microwaving, as it can make them tough.
Nutritional Information (Estimated)
These Irish Scones make for a delightful treat. Here’s a breakdown of the estimated nutritional content per scone:
- Calories: About 200-220
- Carbs: Approximately 35g
- Fat: Around 8g
- Protein: Roughly 3g
These scones are a wonderful indulgence that can fit into an balanced diet when enjoyed in moderation.
Recipe Details
- Prep Time: 15 minutes
- Cook Time: 20 minutes
- Total Time: 35 minutes
- Yield: About 8 scones
Common Questions You Might Have
Can I make these scones ahead of time?
Absolutely! You can prepare the dough ahead of time and refrigerate it for up to 24 hours. When ready to bake, let it sit at room temperature for about 15 minutes, then cut and proceed with baking.
What is the best way to store leftover scones?
Leftover scones should be stored in an airtight container at room temperature for up to three days. For longer storage, you can freeze them in a freezer-safe bag for up to three months. Just be sure to let them thaw at room temperature before enjoying.
Can I substitute the raisins?
Yes, you can easily swap raisins for other ingredients. Consider using dried cranberries, currants, or even chocolate chips for a sweeter touch. Get creative and use whatever you have on hand!
Conclusion
Baking Irish Scones is more than just a recipe; it’s an invitation to create and share happiness. The rush of aromas filling your home and that first warm bite can transport you to a simpler time. Each scone baked with love opens the door to memories and creates new ones, whether at celebratory gatherings or quiet afternoons. The beauty of these scones is in their versatility—perfectly suited for various occasions while encouraging creativity and delightful adaptations. Embrace the process, and invite those you care about to join you, making these Irish Scones not just a treat, but a cherished experience. The next time you crave something comforting and utterly satisfying, remember this little recipe and let it warm your heart and home.
Print
Irish Scones
- Total Time: 35 minutes
- Yield: 8 scones 1x
- Diet: Vegetarian
Description
Deliciously fluffy and buttery Irish Scones, perfect for breakfast or tea time.
Ingredients
- 2 cups all-purpose flour
- 1/4 cup sugar
- 1 tablespoon baking powder
- 1/2 teaspoon salt
- 1/2 cup unsalted butter, cold and cubed
- 1/2 cup milk
- 1 large egg
- 1/2 cup raisins (optional)
Instructions
- Preheat your oven to 400°F (200°C).
- In a large bowl, whisk together the flour, sugar, baking powder, and salt.
- Cut in the cold butter until the mixture resembles coarse crumbs.
- In another bowl, whisk together the milk and egg.
- Pour the milk mixture into the flour mixture and gently stir until just combined.
- If using, fold in the raisins into the dough.
- Turn the dough onto a floured surface and knead gently a few times.
- Pat the dough into a circle about 3/4 inch thick.
- Cut the dough into wedges and place them on a baking sheet lined with parchment paper.
- Bake for 15-20 minutes, or until golden brown.
- Serve warm with butter, jam, and cream.
Notes
For extra flavor, consider adding lemon zest or cheddar cheese to the dough.
- Prep Time: 15 minutes
- Cook Time: 20 minutes
- Category: Snack
- Method: Baking
- Cuisine: Irish
Nutrition
- Serving Size: 1 scone
- Calories: 210
- Sugar: 6g
- Sodium: 200mg
- Fat: 9g
- Saturated Fat: 5g
- Unsaturated Fat: 3g
- Trans Fat: 0g
- Carbohydrates: 34g
- Fiber: 1g
- Protein: 3g
- Cholesterol: 30mg
Keywords: scones, Irish scones, baking, breakfast, tea time