
Red Velvet Brownies
Warm, rich, and decadently sweet, there are few desserts that can evoke the same memories as a homemade brownie fresh from the oven. Picture this: soft, fudgy bites that melt in your mouth, with a hint of chocolate paired with a whisper of tang that can immediately brighten your day. Red Velvet Brownies are not just a dessert; they’re a delightful adventure for your taste buds, especially if you’re craving a colorful twist on good old-fashioned brownies.
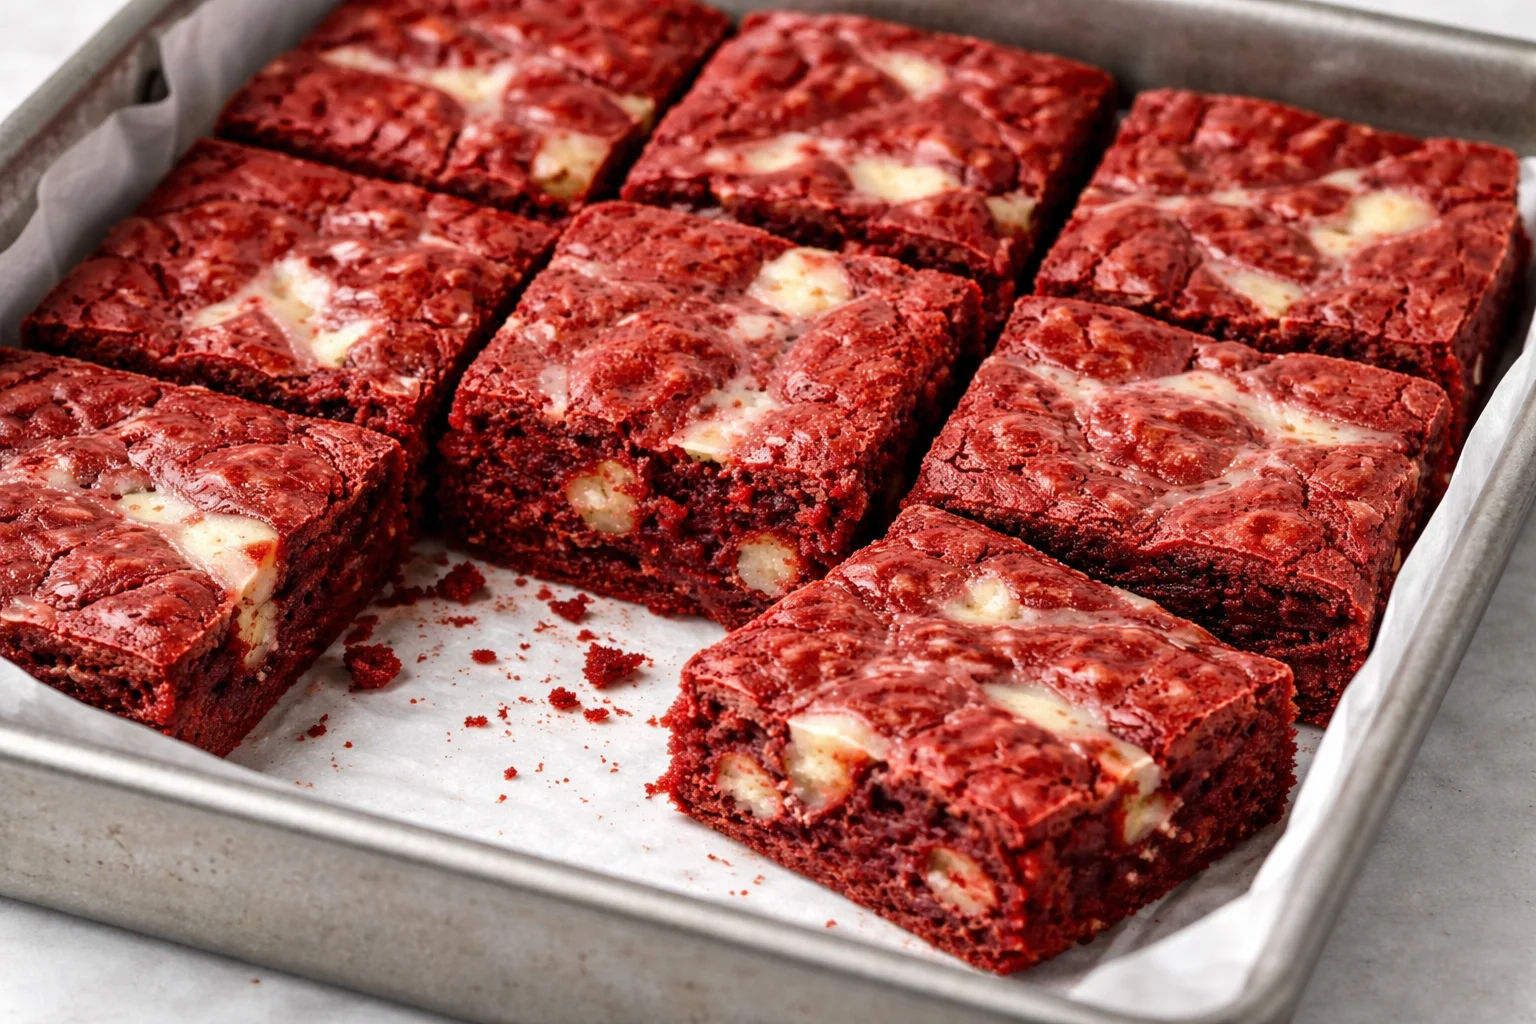
The joy of baking these beauties lies in the blending of flavors and textures. The vibrant red hue not only makes them visually stunning but also infuses a subtle flavor that pairs seamlessly with the creamy white chocolate chips. Each bite invites you to savor the moment, whether you’re sharing with friends at a gathering or indulging in a sweet escape all by yourself. This unique dessert is perfect for celebrations, cozy evenings, or whenever you want to treat yourself to something special.
Let’s dive into why these Red Velvet Brownies deserve a spot in your recipe collection.
Kitchen Essentials You’ll Need
Creating the perfect batch of Red Velvet Brownies requires some essential tools that make the process smooth and enjoyable. Here’s a quick rundown of what you’ll need in your kitchen:
- 8×8 inch baking pan: Essential for achieving the right thickness and texture.
- Mixing bowls: Ideally, have one large bowl for wet ingredients and one for dry.
- Microwave-safe bowl: A must for melting butter and chocolate safely.
- Measuring cups and spoons: Precision is a friend when it comes to baking.
- Flexible spatula or wooden spoon: Great for mixing ingredients thoroughly and scraping down sides.
- Parchment paper: Ensures your brownies release easily from the pan.
Having these tools at your disposal brings ease to your baking experience, allowing you to focus more on the joy of creating rather than fumbling with equipment.
Why You’ll Love This Recipe
This Red Velvet Brownies recipe promises not just scrumptious flavors, but a sense of nostalgia that many will cherish. The combination of rich, melt-in-your-mouth brownie texture with vibrant red color creates a visually captivating dessert that’s sure to impress.
Imagine sinking your teeth into these fudgy delights, the soft chocolate melting away in your mouth, followed by the sweetness of the white chocolate chips—I promise, it’s a luxurious bite each time. These brownies offer more than satisfaction; they evoke emotions, memories, and the joy of sharing something homemade with others.
Here are a few reasons why you’ll absolutely love making them:
- Comfort in a Bite: Each brownie is a warm embrace that comforts your soul.
- Stunning Visuals: The eye-catching color makes them perfect for celebrations or just as a cheerful treat after a long day.
- Simple to Make: Quick and without a ton of fuss, you’ll have a batch ready in no time.
- Versatile: They can be a delightful dessert or a sweet snack at any time of day.
Overall, these brownies encapsulate the essence of comfort food while adding a fun and festive twist.
Red Velvet Brownies Ingredients
To make your delicious Red Velvet Brownies, here’s the list of ingredients you will need:
- 3/4 cup unsalted butter (melted)
- 2 oz chopped semi-sweet chocolate bar
- 1 & 1/4 cup granulated sugar
- 2 large eggs
- 2 teaspoon vanilla extract
- 1 teaspoon white vinegar
- 1/2 tablespoon red gel food coloring
- 2 tablespoons unsweetened cocoa powder
- 1 & 1/4 cup all-purpose flour
- 1/4 teaspoon salt
- 1/2 cup white chocolate chips (optional; can be mixed in the batter or melted and drizzled on top of the brownies)
These ingredients blend beautifully to create a luscious treat that can brighten up any day.
Step-by-Step Instructions
- Preheat your oven to 350°F and line an 8×8 inch baking pan with parchment paper for easy removal later on.
- In a large microwave-safe mixing bowl, melt the butter and chopped chocolate together in the microwave, using 30-second increments. Stir well until completely melted and smooth.
- Add the granulated sugar to the melted mixture and mix until fully combined. Introduce the eggs one at a time, ensuring you beat well after each addition until the mixture is smooth and glossy.
- Stir in the vanilla extract, white vinegar, and red food coloring until well combined, and the batter takes on that beautiful red hue.
- In a separate bowl, sift together the cocoa powder, all-purpose flour, and salt, ensuring there are no lumps.
- Gradually fold the dry ingredients into the wet ingredients. Mix until just combined—be cautious not to overmix to maintain that fudgy texture.
- If desired, gently fold in the white chocolate chips for an extra layer of deliciousness.
- Pour the batter into the prepared baking pan, spreading it evenly.
- Bake in the preheated oven for approximately 30-35 minutes, or until a toothpick inserted into the center comes out with a few moist crumbs (but not wet batter).
- Once baked, allow the brownies to cool completely in the pan. Then, cut into squares.
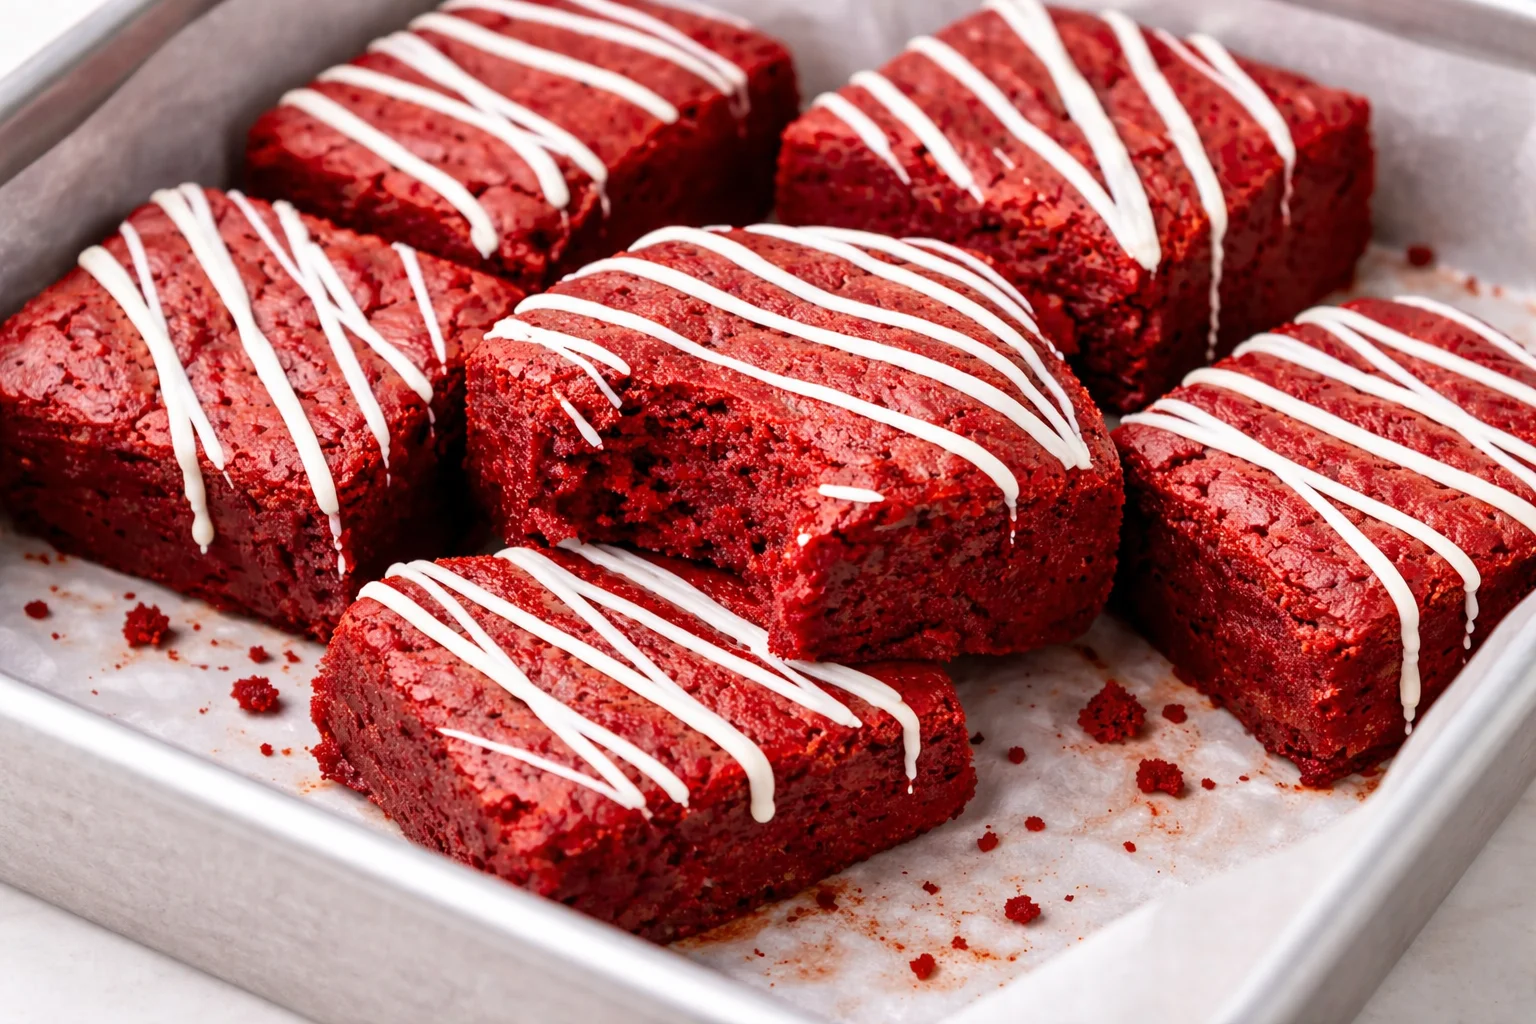
- Optionally, drizzle some melted white chocolate on top once cooled, allow it to set, slice, and enjoy!
Fun Variations You Can Try
With Red Velvet Brownies, the possibilities are endless. Here are some fun variations that can cater to different tastes and occasions:
- Add Nuts: Introduce some chopped walnuts or pecans for a delightful crunch.
- Cream Cheese Swirl: For that classic red velvet cake combo, add a cream cheese swirl to the top of your brownies before baking.
- Mint Chocolate: Swap the white chocolate chips for mint chocolate for a refreshing zing.
- Spice Them Up: Add a touch of cinnamon or chili powder for a warm kick in each bite.
- Gluten-Free: Substitute all-purpose flour with a gluten-free blend for a delicious gluten-free option.
These variations can bring exciting new flavors and textures, allowing you to tailor the recipe to suit any mood or celebration.
How I Love to Serve It
Serving your Red Velvet Brownies is just as delightful as baking them. The rich, red color of the brownies makes them a centerpiece treat for gatherings. I love to plate them on a pretty dessert stand, with a light dusting of powdered sugar or a drizzle of melted white chocolate to enhance their appeal.
Pairing them with a scoop of vanilla ice cream creates a festive feel, while the contrast of warm brownies and cold ice cream contributes to that perfect indulgence. Serving them with a cup of freshly brewed coffee or tea adds a cozy, comforting element, perfect for a quiet afternoon break or special gathering.
For birthdays, place a candle on top or add some vibrant sprinkles to make the occasion feel all the more special. They also make great gifts, neatly wrapped with a ribbon, bringing joy not just through taste but through presentation.
Helpful Tips from My Kitchen
Throughout my adventures in baking, I’ve learned a few handy tips that I think you’ll find helpful:
- Room Temperature Ingredients: For the best results, ensure that your eggs are at room temperature before starting. This helps in creating a lighter batter.
- Melt Carefully: When melting butter and chocolate, do so gently to avoid scorching. Stir often and melt in short intervals.
- Proper Mixing: Avoid overmixing your batter once the dry ingredients are added. This keeps the brownies nice and fudgy instead of cakey.
- Cool Completely: Patience is key. Allowing the brownies to cool completely helps them set perfectly, resulting in clean cuts.
- Storage: Keep leftovers in an airtight container; they’ll stay fresh for up to a week—or longer in the fridge!
Baking is all about creating joyful moments, so don’t hesitate to trust your instincts and find what works best for you!
Important Cooking Reminders
Here are a few important reminders to keep at the forefront of your mind when making these delicious brownies:
- Safety First: Always handle hot pans with care to avoid burns.
- Testing for Doneness: Use a toothpick to check doneness; aim for a few moist crumbs sticking to it rather than wet batter.
- Storage Tips: Keep any leftover brownies in an airtight container at room temperature for up to a week. If refrigerating, let them come to room temperature before serving for the best flavor.
- Common Mistakes: Avoid opening the oven door too early while baking, as this can lead to uneven cooking and sinking.
Following these reminders will help ensure your baking experience is both enjoyable and successful.
Nutritional Information (Estimated)
When indulging in a delightful dessert like Red Velvet Brownies, it helps to be informed about what you’re consuming. Here are the estimated nutritional stats per brownie, assuming a standard 16-serving batch:
- Approximately 200 calories
- 25g carbs
- 10g fat
- 2g protein
This information can be helpful when planning your meals or managing special dietary needs, although a treat like this is undoubtedly worth every bite!
Recipe Details
- Prep Time: 15 minutes
- Cook Time: 30-35 minutes
- Total Time: Approximately 50 minutes
- Yield: 16 servings
Common Questions You Might Have
Can I use other food coloring?
Yes! While red gel food coloring is recommended for vibrant color, feel free to experiment with other colors to match your occasion or personal taste. Just be mindful of how the flavor profile may alter slightly depending on the coloring.
Can I freeze these brownies?
Absolutely! These brownies freeze well. Once they are completely cooled, wrap them tightly in plastic wrap and place them in an airtight container. They can be frozen for up to 3 months. Just thaw them in the refrigerator before serving.
What should I do if my brownies are too crumbly?
If you find your brownies are crumbly, it could be due to overbaking or not enough binding ingredients. To add moisture, consider lightly drizzling with a simple syrup or enjoying with ice cream to balance the dryness.
Conclusion
Each bite of these Red Velvet Brownies brings joy and warmth, like savoring a sweet memory or sharing a laugh with friends. There’s a special magic in baking that transcends mere ingredients; it’s about creating connections, whether with yourself or those you love. The vibrant color, rich texture, and delightful sweetness make these brownies a perfect indulgence for any occasion.
I encourage you to try this recipe and share the delightful experience with friends and family. The wonderful aroma wafting through your kitchen, the cheerful color on your dessert plate, and the smile on your loved ones’ faces will all make this treat worth it.
Doing something special for yourself or others is what life is about, and these Red Velvet Brownies are the perfect way to add a bit of sweetness to your day, embodying both comfort and joy. Happy baking!
Print
Red Velvet Brownies
- Total Time: 50 minutes
- Yield: 16 servings 1x
- Diet: Vegetarian
Description
Warm, rich, and decadently sweet, Red Velvet Brownies are a delightful twist on traditional brownies, featuring a vibrant red hue and white chocolate chips.
Ingredients
- 3/4 cup unsalted butter (melted)
- 2 oz chopped semi-sweet chocolate bar
- 1 1/4 cup granulated sugar
- 2 large eggs
- 2 teaspoon vanilla extract
- 1 teaspoon white vinegar
- 1/2 tablespoon red gel food coloring
- 2 tablespoons unsweetened cocoa powder
- 1 1/4 cup all-purpose flour
- 1/4 teaspoon salt
- 1/2 cup white chocolate chips (optional)
Instructions
- Preheat your oven to 350°F and line an 8×8 inch baking pan with parchment paper.
- In a large microwave-safe mixing bowl, melt the butter and chopped chocolate together in the microwave, using 30-second increments. Stir until smooth.
- Add the granulated sugar to the melted mixture and mix until fully combined. Add the eggs one at a time, beating well after each addition.
- Stir in the vanilla extract, white vinegar, and red food coloring.
- In a separate bowl, sift together the cocoa powder, all-purpose flour, and salt.
- Fold the dry ingredients into the wet ingredients until just combined.
- If desired, gently fold in the white chocolate chips.
- Pour the batter into the prepared baking pan and spread evenly.
- Bake for 30-35 minutes, or until a toothpick comes out with a few moist crumbs.
- Allow the brownies to cool completely in the pan before cutting into squares.
Notes
Optionally, drizzle melted white chocolate on top after cooling.
- Prep Time: 15 minutes
- Cook Time: 35 minutes
- Category: Dessert
- Method: Baking
- Cuisine: American
Nutrition
- Serving Size: 1 brownie
- Calories: 200
- Sugar: 25g
- Sodium: 200mg
- Fat: 10g
- Saturated Fat: 5g
- Unsaturated Fat: 5g
- Trans Fat: 0g
- Carbohydrates: 25g
- Fiber: 1g
- Protein: 2g
- Cholesterol: 30mg
Keywords: red velvet, brownies, dessert, chocolate, sweet treats