
I love the way a simple kitchen project can turn an ordinary evening into something cozy and memorable. Tonight it was the little ritual of stirring, forming, and baking that did it for me. Stuffing Balls arrived in my life as a way to make leftovers feel like a celebration and to bring a warm, fragrant comfort to the dinner table. The first time I made them I remember the soft, herby smell of sage warming the kitchen and the bright pops of dried cranberries against the buttery toasted bread. If you enjoy hands-on, homey bites, you might also like my garlic butter meatballs over creamy parmesan linguine, which has that same comforting, cozy vibe. These little rounds are surprisingly simple and endlessly adaptable, and once you try them you will find yourself shaping memories as much as mixing ingredients.
Kitchen Essentials You’ll Need (Stuffing Balls)
You do not need a fancy set of tools to make these. A few well-chosen pieces of kitchen equipment make the process easy and give you consistent results. The cast of characters in my kitchen includes a roomy mixing bowl for tossing the bread with vegetables, a sturdy skillet for gentle sautéing, and a baking sheet lined with parchment for even browning. A cookie scoop or an ice cream scoop helps size the balls uniformly and keeps your hands cleaner. A spatula and a measuring cup round out the list.
- Large mixing bowl
- Large skillet
- Baking sheet and parchment paper
- Cookie scoop or small ice cream scoop
- Measuring cups and spoons
These items keep everything tidy and make the whole process feel calm and enjoyable, which is half the joy of home cooking.
Why You’ll Love This Stuffing Balls
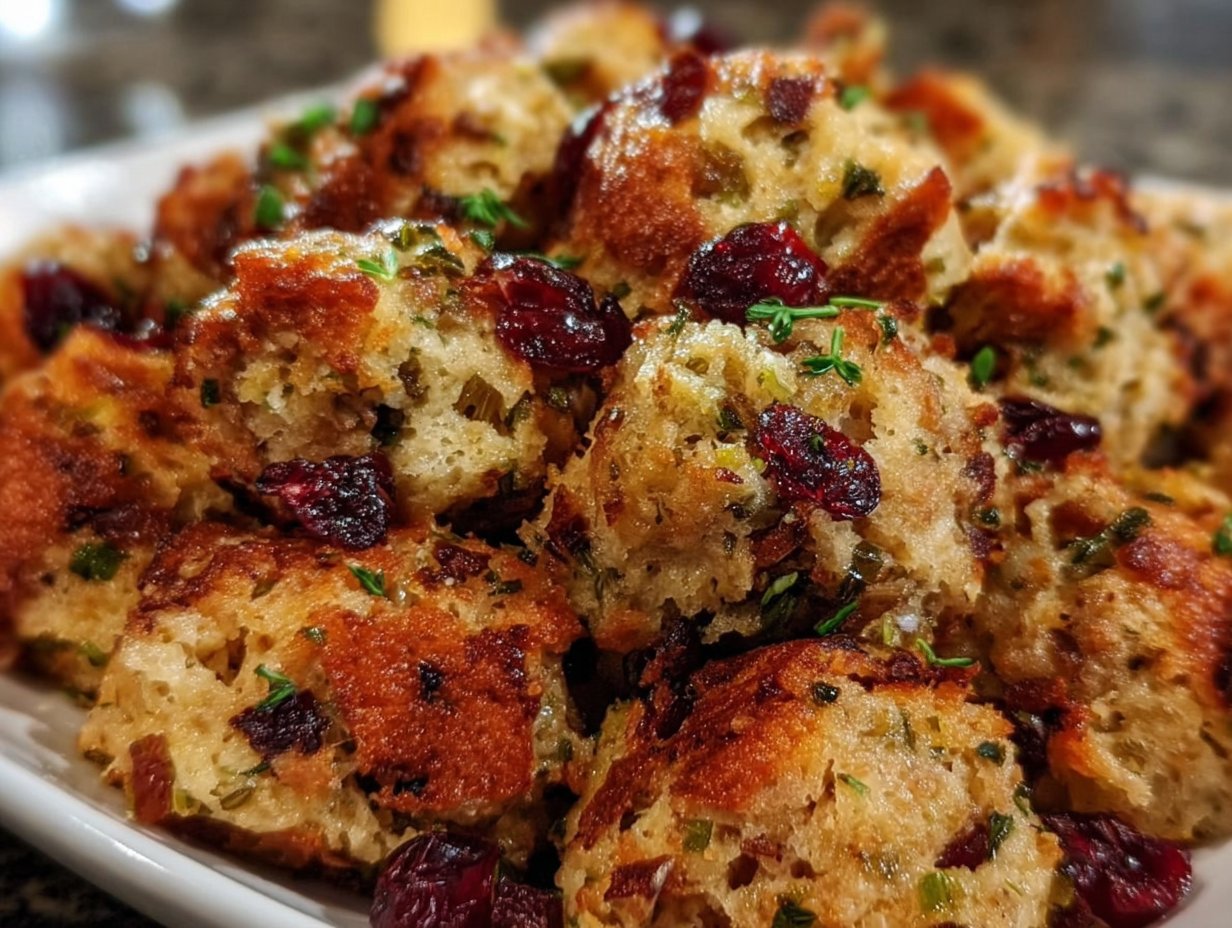
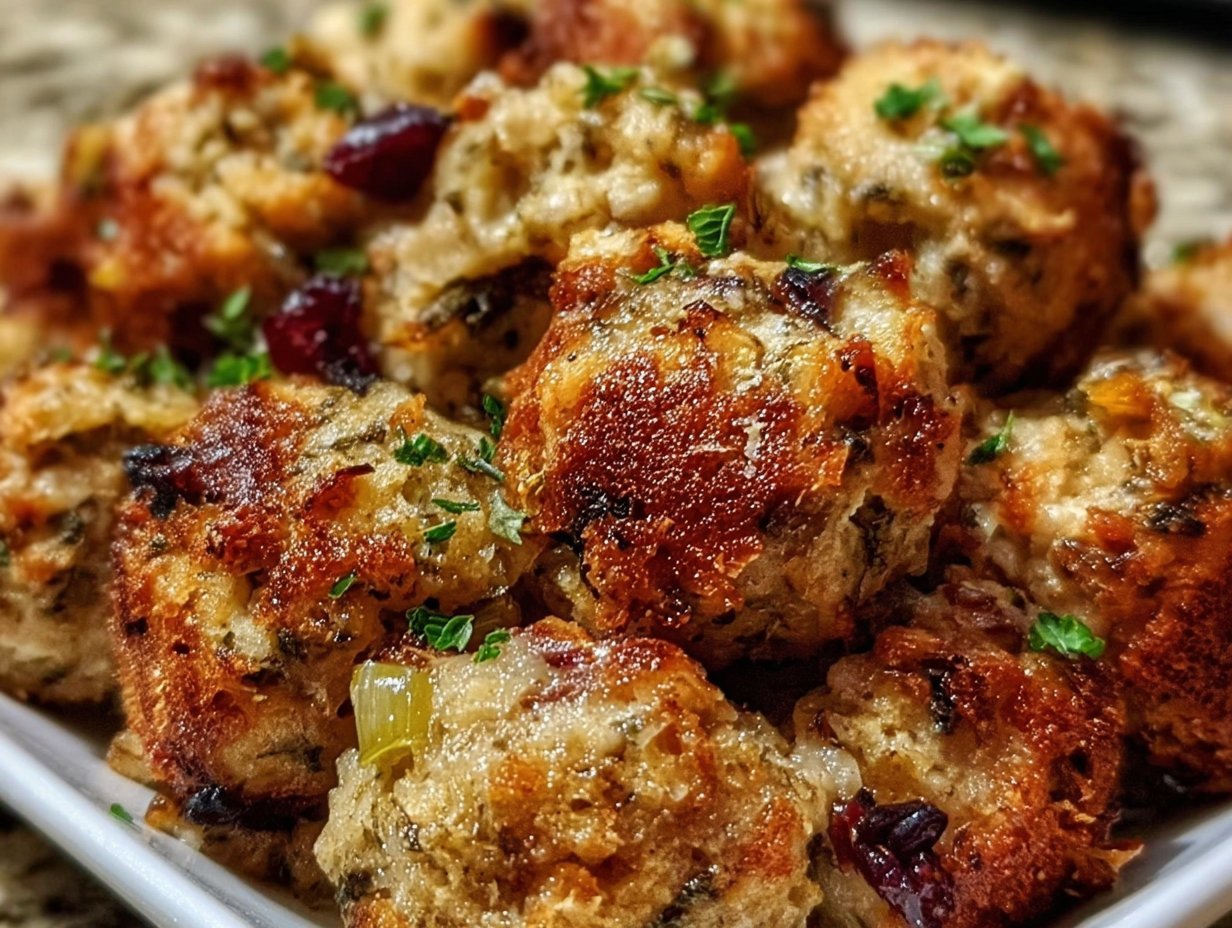
There is something deeply satisfying about a recipe that hits both comfort and convenience. These Stuffing Balls are tender inside with a crisp, golden exterior. The aroma of sage and butter while they bake is nostalgic and soothing. They offer a little sweet note from dried cranberries and a gentle crunch from the sautéed celery and onion. They are cozy, like a warm blanket on a chilly evening.
Beyond flavor, they are practical. Make a batch ahead and reheat them for a quick side or appetizer. They are portable and party-friendly. They also invite creativity without being fussy.
- They are comfort food simplified into single-serving bites.
- They balance savory herbs with a touch of fruity brightness.
- They are easy to portion and perfect for gatherings.
- They reheat well and freeze nicely for meal prep.
If you want to stretch a loaf of bread into something celebratory but uncomplicated, Stuffing Balls give you both flavor and ease. The textures and smells are the kind that make people pause and say, “Wow, what is that?” and then ask for seconds.
Stuffing Balls Ingredients
You will use basic pantry and fridge components to bring these to life. Please use the exact items below as the base of the recipe.
1 loaf of bread, cubed, 1 cup celery, diced, 1 cup onion, diced, 1/2 cup cranberries, dried, 2 tablespoons sage, dried, 2 cups vegetable broth, 1/2 cup butter, melted, Salt and pepper to taste
Beyond that base, you can rely on pantry staples like a clove of garlic for extra warmth or a splash of olive oil if you prefer not to use all the butter. But the list above is the heart of the recipe and gives you that classic, familiar stuffing flavor in a fun, handheld form.
Step-by-Step Instructions
- Preheat and prepare. Preheat your oven to 350°F (175°C). Line a baking sheet with parchment paper so the bottoms crisp up without sticking. You should be able to smell a faint warmth in the air as the oven comes to temperature.
- Sauté the vegetables. In a large skillet, melt the butter over medium heat. When the butter is bubbling and fragrant, add the diced celery and onions. Sauté until the vegetables are softened and translucent, about five to seven minutes. You will notice the onion turn glossy and the mixture give off a sweet, savory scent.
- Mix the base. In a large bowl, combine the cubed bread, sautéed vegetables, cranberries, and sage. Gradually add the vegetable broth while stirring, a little at a time, until the bread is evenly moistened but not soggy. The texture should be cohesive and slightly springy when pressed. Season generously with salt and pepper and taste to adjust.
- Shape the balls. With lightly damp hands or using a cookie scoop, shape the mixture into evenly sized balls. Press gently so they hold together without being compressed into a dense lump. Place them on the prepared baking sheet a little apart so air can circulate and they can brown.
- Bake to golden. Bake for about 25 to 30 minutes, or until the outsides are golden brown and have a pleasant, crisp snap when you tap them. The centers should feel warm and tender when pierced with a fork. Serve warm right out of the oven.
Fun Variations You Can Try
- Add grated sharp cheddar or crumbled goat cheese to the mixture for a richer, creamier center.
- Swap the dried cranberries for chopped dried apricots or cherries for a different sweet note.
- For a nutty crunch, fold in 1/3 cup toasted pecans or chopped walnuts.
- Make these vegetarian by keeping the vegetable broth and adding sautéed mushrooms in place of some of the onion for a deeper umami flavor.
- If you want more herb brightness, add 1 tablespoon chopped fresh parsley or a teaspoon of thyme.
- To turn them into a gluten-free option, use a gluten-free loaf and check that your breadcrumbs are suitable.
- For a more indulgent version, finish with a light drizzle of browned butter before serving.
These swaps let you tailor the bowls to the season or your pantry while keeping the simple, comforting core intact.
How I Love to Serve It
There is a very particular joy in how these tiny rounds look on a tray and how they feel on the plate. I like arranging them in clusters on a shallow platter so guests can nab one or two. Their golden color contrasts beautifully with a sprig of fresh parsley or a scattering of pomegranate seeds in winter.
Pair them with a simple roast or a pot of braised greens. They are lovely alongside a tart cranberry chutney or a smooth, garlicky aioli. For a cozy weeknight, serve them with a bowl of tomato soup for dipping; the texture contrast is heavenly. If you are hosting, adding a small bowl of warm gravy or herbed butter lets people personalize each bite.
I also sometimes serve them as part of a holiday spread next to roasted root vegetables and a bright, citrusy slaw. For a casual brunch, serve them with soft scrambled eggs and a peppery arugula salad. If you enjoy lighter flavors, try pairing them with my lighter lemony meatballs; they complement one another beautifully here is a recipe that pairs well.
Helpful Tips from My Kitchen
Cooking is about patience and little tricks that save time and stress. I like to toast the cubed bread lightly in a low oven before mixing if it is very fresh. That helps the bread absorb liquid without turning mushy. When adding the vegetable broth, pour slowly and test the texture by gently squeezing a handful; it should hold shape but still be soft.
If the mixture feels too wet, let it rest for 10 minutes so the bread can absorb more liquid, then adjust. If it is too dry and falling apart, add a splash more broth or an extra tablespoon of melted butter. Keep your hands slightly damp when rolling so the mixture does not stick to your fingers.
You can prepare them up to shaping and keep the mixture in the fridge for a day. When baking from chilled, add 5 minutes to the baking time and watch for that golden exterior. For freezer storage, flash-freeze the shaped balls on a tray until firm, then transfer to a labeled bag. Reheat directly from frozen and add about 10 minutes to baking time, covering with foil if they brown too quickly.
Simple seasoning checks are key. Taste a small spoonful of the cooked vegetable mix and adjust salt, pepper, and sage before combining with the bread. This tiny practice prevents bland results and makes the flavors sing.
Important Cooking Reminders
- Let the mixture rest if the bread seems dry before adding more broth so it absorbs evenly.
- Bake on a lined sheet for easy cleanup and even browning.
- Reheating: warm leftover balls in a 350°F oven for 10 to 12 minutes to regain crispness.
- Storage: refrigerate in an airtight container for up to four days or freeze for up to three months.
- Common mistakes: over-moistening the bread which makes dense balls, or under-seasoning before shaping.
- Safety note: ensure the centers are heated through when reheating, especially if stored from the refrigerator.
Nutritional Information (Estimated)
These are rough estimates for one medium-sized Stuffing Ball assuming the recipe yields about 18 balls. Each ball is likely around 120 to 160 calories depending on the bread type and added ingredients. Carbohydrates will be the largest component at roughly 15 to 20 grams. Fat mainly comes from the butter and is about 6 to 9 grams. Protein is modest, around 2 to 4 grams per ball. Adjusting the butter amount or swapping in a lower-fat broth will influence these numbers.
- Calories: ~140 per ball
- Carbs: ~18 g
- Fat: ~7 g
- Protein: ~3 g
Recipe Details
- Prep Time: 20 minutes
- Cook Time: 25–30 minutes
- Total Time: 45–50 minutes
- Yield: about 18 to 20 stuffing balls
Common Questions You Might Have
Can I make the mixture ahead of time and bake later?
Yes. You can prepare the full mixture and refrigerate it, covered, for up to 24 hours before shaping and baking. When you are ready to bake, shape the balls, place them on the sheet, and give them an extra 5 minutes in the oven if they are chilled. If frozen as shaped balls, add about 10 minutes to the bake time.
What bread works best for these?
Hearty, slightly stale bread is ideal because it soaks up the broth without becoming gummy. A rustic country loaf, sourdough, or even slightly stale sandwich bread can work. If your bread is very fresh, toast the cubes lightly in a 300°F oven for 8 to 10 minutes until they feel dry to the touch.
How can I make them crispier on the outside?
Try a couple of approaches: bake them on a preheated baking sheet for immediate contact crisping, brush the outsides lightly with additional melted butter before baking, or place them under the broiler for a minute at the end while watching closely. If doing the broiler step, rotate the pan so they brown evenly and do not burn.
Conclusion
As the tray comes out of the oven and fills the room with sage and butter, I always pause to breathe it in and think about how small rituals in the kitchen layer into our memories. Stuffing Balls are one of those recipes that wrap warmth and simplicity into every bite. They are forgiving, so they welcome experimentation, yet they deliver the exact comforting flavors we reach for during chilly nights and family meals. Whether you serve them beside a roast, alongside a steaming pot of soup, or as finger food at a gathering, these little bites have a way of making people lean in and smile. Keep a batch in the freezer for later, and you will have an easy way to summon that cozy feeling whenever you need it. Stuffing Balls hold the kind of comfort that travels from kitchen to heart, and I hope you make them a regular in your home.
Print
Stuffing Balls
- Total Time: 50 minutes
- Yield: 18-20 servings 1x
- Diet: Vegetarian
Description
Comforting and flavorful stuffing balls perfect for any gathering, made with simple pantry ingredients and seasoned with sage and cranberries.
Ingredients
- 1 loaf of bread, cubed
- 1 cup celery, diced
- 1 cup onion, diced
- 1/2 cup cranberries, dried
- 2 tablespoons sage, dried
- 2 cups vegetable broth
- 1/2 cup butter, melted
- Salt and pepper to taste
Instructions
- Preheat your oven to 350°F (175°C) and line a baking sheet with parchment paper.
- In a large skillet, melt the butter over medium heat, then add the diced celery and onions. Sauté until softened, about 5-7 minutes.
- In a large bowl, combine the cubed bread, sautéed vegetables, cranberries, and sage. Gradually add vegetable broth while stirring until the bread is moistened but not soggy. Season with salt and pepper to taste.
- Shape the mixture into balls with slightly damp hands or a cookie scoop, placing them on the prepared baking sheet.
- Bake for 25-30 minutes or until golden brown and crisp on the outside. Serve warm.
Notes
These balls are great for make-ahead meals; cook and freeze for later enjoyment. Try different variations with cheeses or nuts for added flavor.
- Prep Time: 20 minutes
- Cook Time: 30 minutes
- Category: Appetizer
- Method: Baking
- Cuisine: American
Nutrition
- Serving Size: 1 ball
- Calories: 140
- Sugar: 6g
- Sodium: 250mg
- Fat: 7g
- Saturated Fat: 4g
- Unsaturated Fat: 2g
- Trans Fat: 0g
- Carbohydrates: 18g
- Fiber: 1g
- Protein: 3g
- Cholesterol: 15mg
Keywords: stuffing balls, comfort food, appetizer, holiday recipe, vegetarian recipe