I still remember the first time a simple sandwich felt like a warm, full stop after a hectic day. The kitchen light was low, the hum of the oven felt like a small companion, and I wanted something fast, comforting, and a little nostalgic. When I pulled together a quick tuna filling and tucked it into a warm wrap, the crunch of lettuce and the melt of cheese made me sigh in the best way.
The Tuna Melt Wrap fits perfectly into those small, everyday moments when you need something nourishing but uncomplicated. It’s one of those recipes that comforts without fuss. In the next few minutes I’ll walk you through everything from the tools you’ll want to have on hand to little tricks that make this wrap taste like you lingered over it for hours. Whether it’s a rushed lunch or a cozy solo dinner, this wrap is ready to hug your hunger and warm your hands.
Kitchen Essentials You’ll Need — Tuna Melt Wrap
This recipe is forgiving, but a few simple tools make the experience smoother and more enjoyable. A sturdy mixing bowl gives your tuna a cozy place to be seasoned and fluffed. A good chef’s knife makes quick work of slicing tomatoes and tearing lettuce into the right bite-sized pieces. If you like your cheese melted, a nonstick skillet or a sandwich press is a small joy that finishes the wrap beautifully.
You’ll want:
- A medium mixing bowl for combining the tuna, mayo, and mustard.
- A sharp knife and cutting board for tomatoes and lettuce.
- A nonstick skillet or grill pan for optional toasting.
- A spatula to flip and press the wrap when grilling.
These little helpers mean less fuss and more time enjoying the warm, creamy bite of the Tuna Melt Wrap.
Why You’ll Love This Tuna Melt Wrap
There are recipes that solve a hunger and recipes that create a memory. This Tuna Melt Wrap does both. It’s creamy from the mayonnaise, tangy from Dijon mustard, and bright from fresh tomatoes and crisp lettuce. The wrap itself adds a comforting, hand-held element that makes it perfect for lunch boxes, quick dinners, or a picnic blanket on a sunny afternoon.
You’ll adore it because:
- It’s fast and reliable. Ready in minutes, and the flavor feels like something you’d order at a favorite cafe.
- The texture contrasts sing: creamy tuna, soft melted cheese, and crisp lettuce in one bite.
- It’s adaptable. Swap the cheese, add a little crunch, or make it lighter or heartier depending on the day.
- It’s pantry-friendly. Almost everything you need is already in your kitchen.
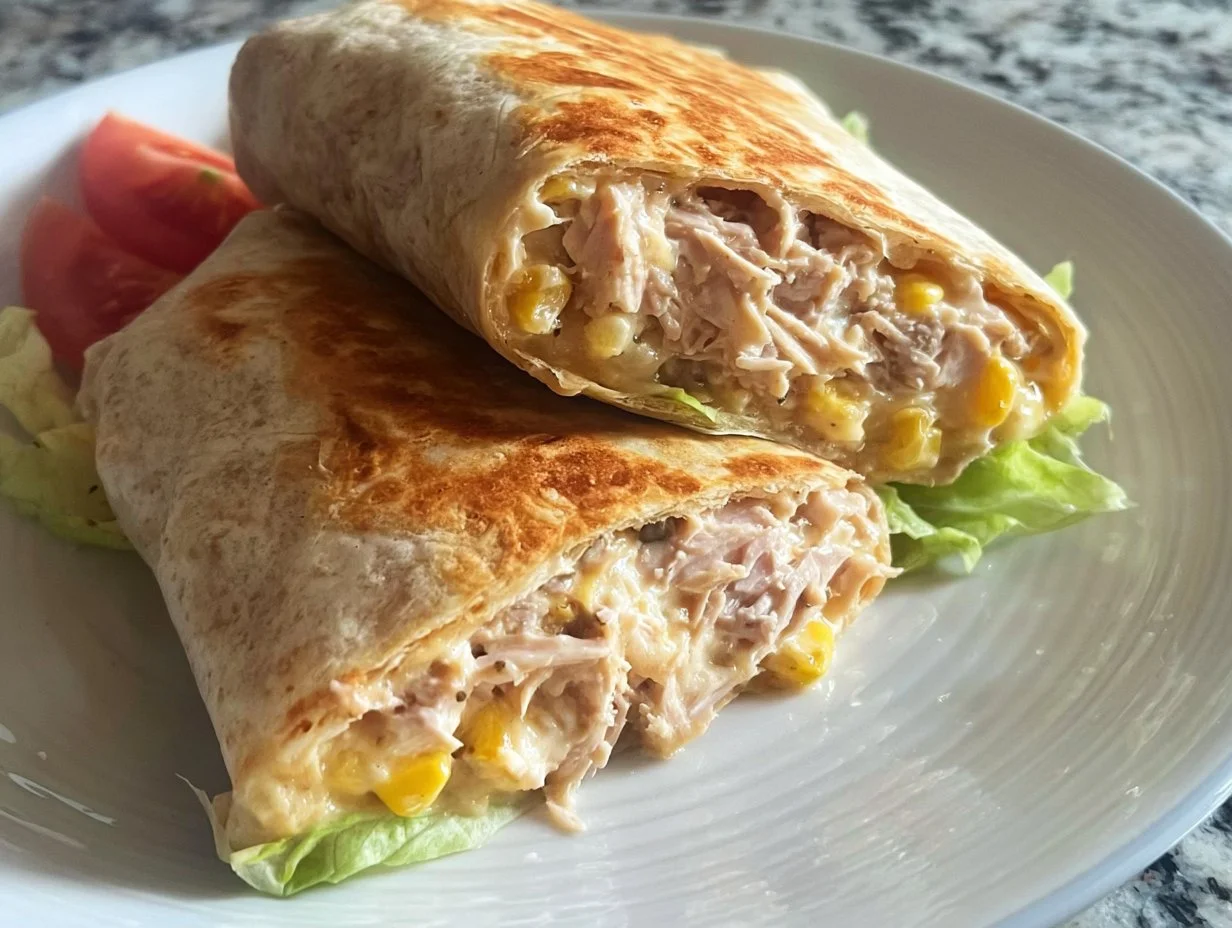
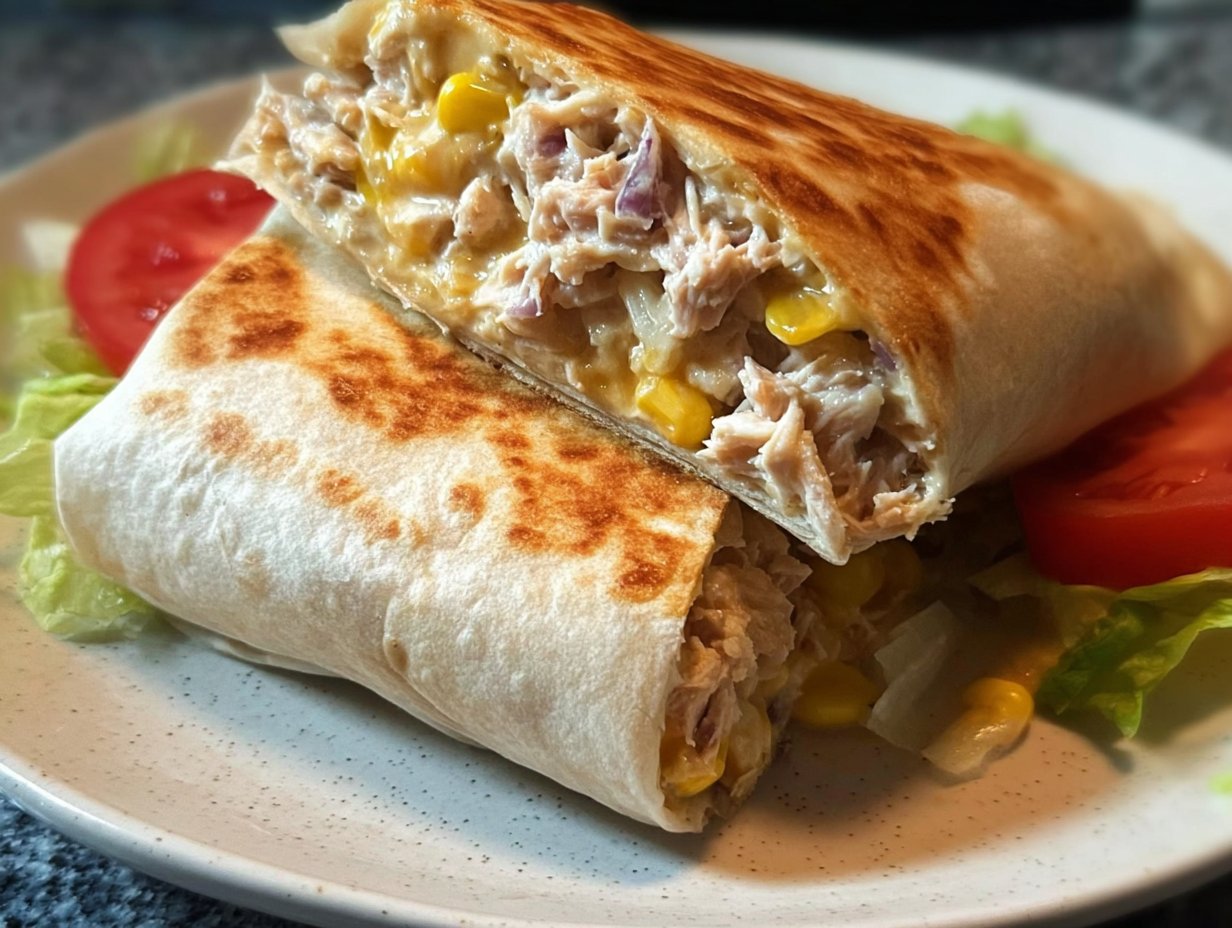
Imagine lifting that warm wrap and catching a whiff of melted cheese and Dijon. The soft, slightly toasted tortilla yields to a creamy center studded with bright tomato and green lettuce. It’s comfort that fits in your hands and is happiest when shared.
Tuna Melt Wrap Ingredients
Here’s the exact ingredient list to start with: 1 can of tuna, drained, 2 tablespoons mayonnaise, 1 tablespoon Dijon mustard, Salt and pepper to taste, 1 whole wheat wrap or tortilla, 1 slice of cheese (cheddar or your choice), Lettuce leaves, Sliced tomatoes.
To build on that foundation, I often keep a few pantry friends nearby. A squeeze of lemon brightens the tuna without changing the simplicity. A pinch of garlic powder or a few finely chopped red onion pieces add depth if you’re craving more savory notes. A light brush of butter or olive oil on the tortilla takes the wrap from fresh to lightly golden if you’re toasting it. These extras are optional but make the wrap feel even more homey.
Step-by-Step Instructions
- Gather your ingredients and place the drained tuna in a medium mixing bowl. Break the tuna up with a fork until it is flaky but still holds little lumps. The texture should feel moist, not dry.
- Add 2 tablespoons mayonnaise and 1 tablespoon Dijon mustard to the bowl. Season with salt and pepper to taste. Stir gently until the mixture is creamy and uniform, with tiny ribbons of mayonnaise visible and a bright, slightly tangy aroma of mustard.
- Lay the whole wheat wrap on a clean, flat surface. Lightly warm it if you prefer a more pliable wrap; a few seconds in the microwave or on a skillet will soften it so it folds easily.
- Spread the tuna mixture evenly over the center of the wrap, leaving a narrow border around the edges. You should see a smooth layer of pale, speckled tuna that smells tangy and savory.
- Place a slice of cheese on top of the tuna mixture. The cheese should cover most of the tuna; when warmed it will soften and meld into the filling.
- Add Lettuce leaves and Sliced tomatoes over the cheese. The lettuce gives a crisp, green contrast and the tomatoes bring juicy brightness. Together they add a fresh crunch against the creamy tuna.
- Roll the wrap tightly, tucking in the sides as you go, then slice in half to serve. If you prefer the cheese melted, heat a nonstick skillet over medium heat, brush the outside of the wrap with a touch of butter or oil, and grill the halves for a couple of minutes per side until golden and the cheese has softened.
Fun Variations You Can Try
- Add crunch: Stir in a handful of finely chopped celery or toasted chopped walnuts for texture.
- Make it spicy: Mix a teaspoon of sriracha or a pinch of cayenne into the tuna for a warm kick.
- Go Mediterranean: Swap Dijon for a teaspoon of capers and add chopped olives and a sprinkle of dried oregano.
- Lighter version: Use Greek yogurt instead of mayonnaise and choose a low-carb wrap.
- Add herbs: Fresh dill, parsley, or chives make the filling feel bright and garden-fresh.
- Swap the protein: Use canned salmon or shredded rotisserie chicken in place of tuna for a different flavor profile.
- Extra melty: Layer on provolone or Swiss instead of cheddar for a smoother melt.
These swaps let the Tuna Melt Wrap stretch into whatever your mood or pantry calls for. Small tweaks transform it from everyday lunch to something a little more special.
How I Love to Serve It
I like to present this wrap in a way that feels cozy and casual. I slice the wrap on the diagonal so each half shows its colorful layers: the pale tuna, the golden cheese, the green lettuce, and the red tomato. A simple plate, a linen napkin, and a steaming mug of something warm make a perfectly contented meal.
Sides I love:
- A small bowl of crisp potato chips or a handful of kettle chips for salt and crunch.
- A bright, simple salad with lemon and olive oil to keep the meal feeling fresh.
- Pickles or a few olives on the side to cut through the richness.
Serve this on a weekday lunch break, on a picnic, or as a light dinner with a candle flickering nearby. It’s satisfying without being heavy, and the textures make every bite interesting. Invite someone over, or tuck in alone with a good book. Either way, it feels like a moment well spent.
Helpful Tips from My Kitchen
Think of this recipe as a template that loves small, thoughtful details. Always taste as you go, especially when seasoning the tuna. A little salt and pepper tailored to your palate makes a big difference. If your canned tuna seems a bit dry, a touch more mayonnaise or a teaspoon of olive oil helps the texture come alive again.
- Drain the tuna well but not so dry that it becomes crumbly.
- Chop tomatoes just before assembling to avoid soggy wraps.
- If using red onion, soak the slices briefly in cold water to tame sharpness.
- Warm the wrap gently before filling to prevent cracking when rolling.
- For neat rolling, fold the bottom edge up over the filling, then fold the sides in and continue rolling tightly.
- If prepping ahead, keep the lettuce and tomatoes separate until just before serving to preserve crunch.
- When grilling, press lightly with a spatula for even browning and faster melting.
These small practices keep the wrap feeling fresh, bright, and effortless every time you make it.
Important Cooking Reminders
- Store leftover tuna mixture in an airtight container in the refrigerator for up to 3 days.
- If you assemble the wrap ahead, keep lettuce and tomatoes separate and add them right before eating to avoid sogginess.
- Reheat a grilled wrap in a skillet over low heat to warm through and re-crisp the exterior. Avoid microwaving if you want the wrap to stay slightly crisp.
- Be careful when grilling — use medium heat and watch closely to prevent the tortilla from burning while the cheese warms.
- Check the canning date on your tuna and follow safe storage guidelines for opened cans and refrigerated leftovers.
Nutritional Information (Estimated)
A rough estimate per serving for this Tuna Melt Wrap, made with one standard can of tuna, one tablespoon of mayonnaise, one slice of cheddar, a whole wheat tortilla, and vegetables: about 420 calories, roughly 35–40 grams of carbohydrates primarily from the wrap, 20–25 grams of fat depending on the amount of mayonnaise and cheese used, and around 25–30 grams of protein from the tuna and cheese. Swapping low-fat mayo or a lighter tortilla will lower calories and fat while keeping protein relatively high.
Recipe Details
- Prep Time: 10 minutes
- Cook Time: 4–6 minutes (if grilling)
- Total Time: 15 minutes
- Yield: 1 wrap

Common Questions You Might Have
Can I use canned salmon instead of tuna?
Yes, canned salmon is a terrific swap. It brings a richer, slightly sweeter flavor and pairs beautifully with the same mayonnaise and mustard combination. If your salmon has bones or skin, flake them out and adjust salt carefully. The texture will be similar and the wrap will be just as satisfying.
How do I keep the wrap from getting soggy when packing for later?
Pack the components separately when possible. Keep the tuna mixture in one container and the lettuce and sliced tomatoes in another. Assemble just before eating. If you must assemble ahead, lay a paper towel inside the wrap to absorb excess moisture and place the lettuce next to the tuna instead of directly on top of the tomatoes.
Can I make this vegetarian?
Absolutely. For a vegetarian version, mash cooked chickpeas with the mayonnaise and mustard for a chickpea “tuna” salad. Add the same slice of cheese, lettuce, and tomato, and follow the same rolling and grilling steps. You’ll get similar creaminess and texture with a plant-forward protein swap.
Conclusion
There’s a quiet joy in making something simple that feels like a small celebration. A Tuna Melt Wrap brings together pantry staples and fresh touches, and in just a few minutes you have a meal that comforts and satisfies. Whether you keep it classic or try one of the fun variations, it’s the kind of recipe that welcomes improvisation and rewards it with flavor.
If you want more inspiration or another take on the same cozy concept, I often look to other favorite versions for ideas like different cheeses and toasting techniques. For another approachable riff, check out this Tuna Melt Wrap – Nibble and Dine for a slightly different spin. And if you’re curious about an extra indulgent, melty take, the Ultimate Tuna Melt Wrap | Somebody Feed Seb shows a very satisfying, full-flavor approach.
Thanks for spending these few minutes with me in the kitchen. I hope this wrap finds a regular spot in your weeknight rotation and brings you the little, delicious comfort it brings to my table.
Print
Tuna Melt Wrap
- Total Time: 16 minutes
- Yield: 1 wrap 1x
- Diet: None
Description
A quick and comforting Tuna Melt Wrap filled with creamy tuna, melted cheese, and fresh vegetables, perfect for lunch or dinner.
Ingredients
- 1 can of tuna, drained
- 2 tablespoons mayonnaise
- 1 tablespoon Dijon mustard
- Salt and pepper to taste
- 1 whole wheat wrap or tortilla
- 1 slice of cheese (cheddar or your choice)
- Lettuce leaves
- Sliced tomatoes
Instructions
- Gather your ingredients and place the drained tuna in a medium mixing bowl. Break the tuna up with a fork until it is flaky but still holds little lumps.
- Add mayonnaise and Dijon mustard to the bowl. Season with salt and pepper to taste. Stir gently until the mixture is creamy and uniform.
- Lay the whole wheat wrap on a clean, flat surface. Lightly warm it if preferred.
- Spread the tuna mixture evenly over the center of the wrap, leaving a narrow border around the edges.
- Place a slice of cheese on top of the tuna mixture.
- Add lettuce leaves and sliced tomatoes over the cheese.
- Roll the wrap tightly, tucking in the sides as you go, then slice in half to serve.
- If you prefer the cheese melted, heat a nonstick skillet over medium heat, brush the outside of the wrap with butter or oil, and grill the halves for a couple of minutes per side until golden and the cheese has softened.
Notes
For added flavor, consider stirring in finely chopped celery, using Greek yogurt instead of mayonnaise, or adding herbs like dill or parsley.
- Prep Time: 10 minutes
- Cook Time: 6 minutes
- Category: Main Course
- Method: Grilling
- Cuisine: American
Nutrition
- Serving Size: 1 serving
- Calories: 420
- Sugar: 3g
- Sodium: 600mg
- Fat: 20g
- Saturated Fat: 8g
- Unsaturated Fat: 9g
- Trans Fat: 0g
- Carbohydrates: 40g
- Fiber: 5g
- Protein: 25g
- Cholesterol: 50mg
Keywords: tuna, sandwich, wrap, quick meal, comfort food