
Valentine’s Day Chocolate Bark
Every special occasion deserves a sweet touch, and what’s more delightful than crafting your very own chocolate treat? This Valentine’s Day, let’s bring a little magic into the kitchen with a delicious recipe that is as fun to make as it is to share. Picture this: rich, velvety chocolate intermingling with colorful sprinkles and a dreamy marbled look that’s bursting with love. Whether you’re celebrating with a partner, friends, or just treating yourself, this treats radiate warmth and affection, perfect for all your loved ones.
Prepare yourself for an indulgent experience with this simple yet deeply satisfying recipe for chocolate bark. It’s the type of sweet that sparks joy and creates lasting memories in the kitchen, making it an ideal activity for kids and adults alike. You’ll be amazed at how easily you can whip up this delightful Valentine’s Day Chocolate Bark, leaving everyone craving another piece.
Kitchen Essentials You’ll Need
To create this festive chocolate bark, you’ll want to have a few essential tools handy. These items will not only make your experience smoother but will also ensure your chocolate bark turns out just right. You’ll find that using the correct tools can make all the difference in both the process and presentation.
- Microwave-safe bowl
- Parchment paper
- Baking sheet
- Toothpick or knife for swirling
- Measuring cups (for the chocolate chips and melts)
Having these kitchen essentials will make your chocolate-making adventure a breeze. Let’s get all set up and dive into this delightful recipe!
Why You’ll Love This Recipe
There’s an irresistible charm in homemade treats, and this one is a standout. Imagine biting into rich layers of semi-sweet chocolate, sweet and creamy white chocolate, all beautifully contrasted with splashes of pink candy melts. The flavor combinations are not just rich; they’re layered in a way that excites the taste buds.
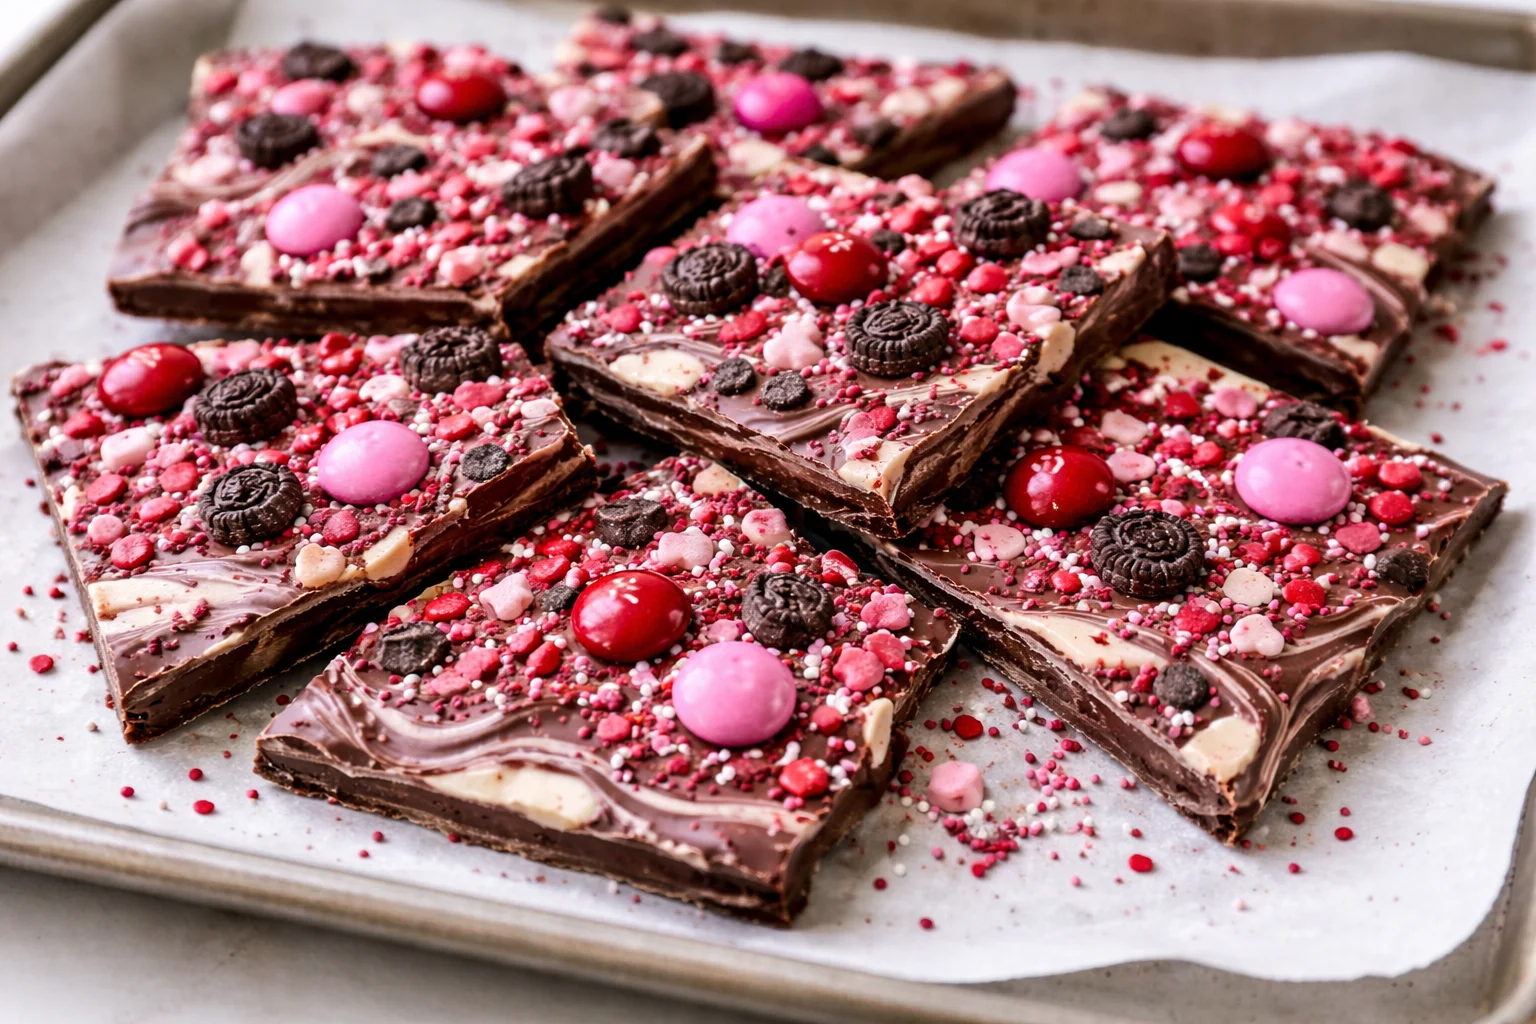
Sweet and colorful, this Valentine’s Day Chocolate Bark is a celebration of love and sweetness. It looks stunning, making it a fabulous centerpiece for your Valentine’s gathering. Picture it on a platter, shimmering with Valentine’s sprinkles, begging to be sampled. The aroma wafting through the air while melting the chocolate is comforting and nostalgic, reminding you of happy kitchen moments spent creating deliciousness with loved ones.
Here are just a few reasons to fall in love with this chocolate bark:
- Quick and Easy: It requires minimal effort, letting you spend more time with your loved ones.
- Visual Appeal: The vibrant colors and textures catch the eye and add a festive touch to any celebration.
- Customizable: You can mix and match different toppings or chocolates based on your preferences.
- Shareable Joy: Perfect for gifting, whether as party favors or sweet surprises for friends.
This recipe isn’t just about taste; it’s about spreading love and joy, making it the perfect treat for Valentine’s Day or any day you want to indulge in a little sweetness.
Valentine’s Day Chocolate Bark Ingredients
To whip up this delightful treat, you’ll need some delicious ingredients. Gather the following:
- 2 cups semi sweet chocolate chips
- 1 cup white chocolate chips
- ½ cup pink candy melts
- ½ cup Valentine’s sprinkles
These ingredients will create a delightful flavor profile and make our chocolate bark visually stunning. The combination of the semi-sweet chocolate and creamy white chocolate balances beautifully while the pink candy melts and sprinkles add a fun, festive vibe.
Step-by-Step Instructions
Making your own chocolate bark is not only simple but also incredibly enjoyable. Here’s how to create your Valentine’s Day Chocolate Bark in just a few easy steps:
Start by melting the semi sweet chocolate chips in a microwave-safe bowl. Heat them in 30-second intervals, stirring in between, until the mixture is smooth and glossy. The warm aroma will fill your kitchen, bringing a sense of cozy anticipation.
Once melted, pour the semi-sweet chocolate onto a parchment-lined baking sheet. With a spatula, spread it out evenly, making sure to fill the corners. Watch as the rich chocolate sets the base for your colorful sweetness.
Next, melt the white chocolate chips in the microwave using the same method, heating in 30-second increments until smooth. The creamy scent will make it hard to resist tasting right from the bowl!
Carefully drizzle the melted white chocolate over the semi-sweet layer, creating lovely white ribbons atop the dark chocolate. This marbling is where the magic begins!
Now it’s time for the pink candy melts! Melt them following the same instructions, and drizzle the vibrant pink over the layered chocolates. The brightness of the pink will awaken your senses and brighten your mood like nothing else.
Using a toothpick or a knife, gently swirl the chocolates together. The mixture will create a beautiful marbled effect that is as pleasing to the eyes as it is to the palate.
Don’t forget the final touch: generously sprinkle Valentine’s sprinkles on top. This is your chance to get creative! Spread them out evenly to add that festive visual appeal.
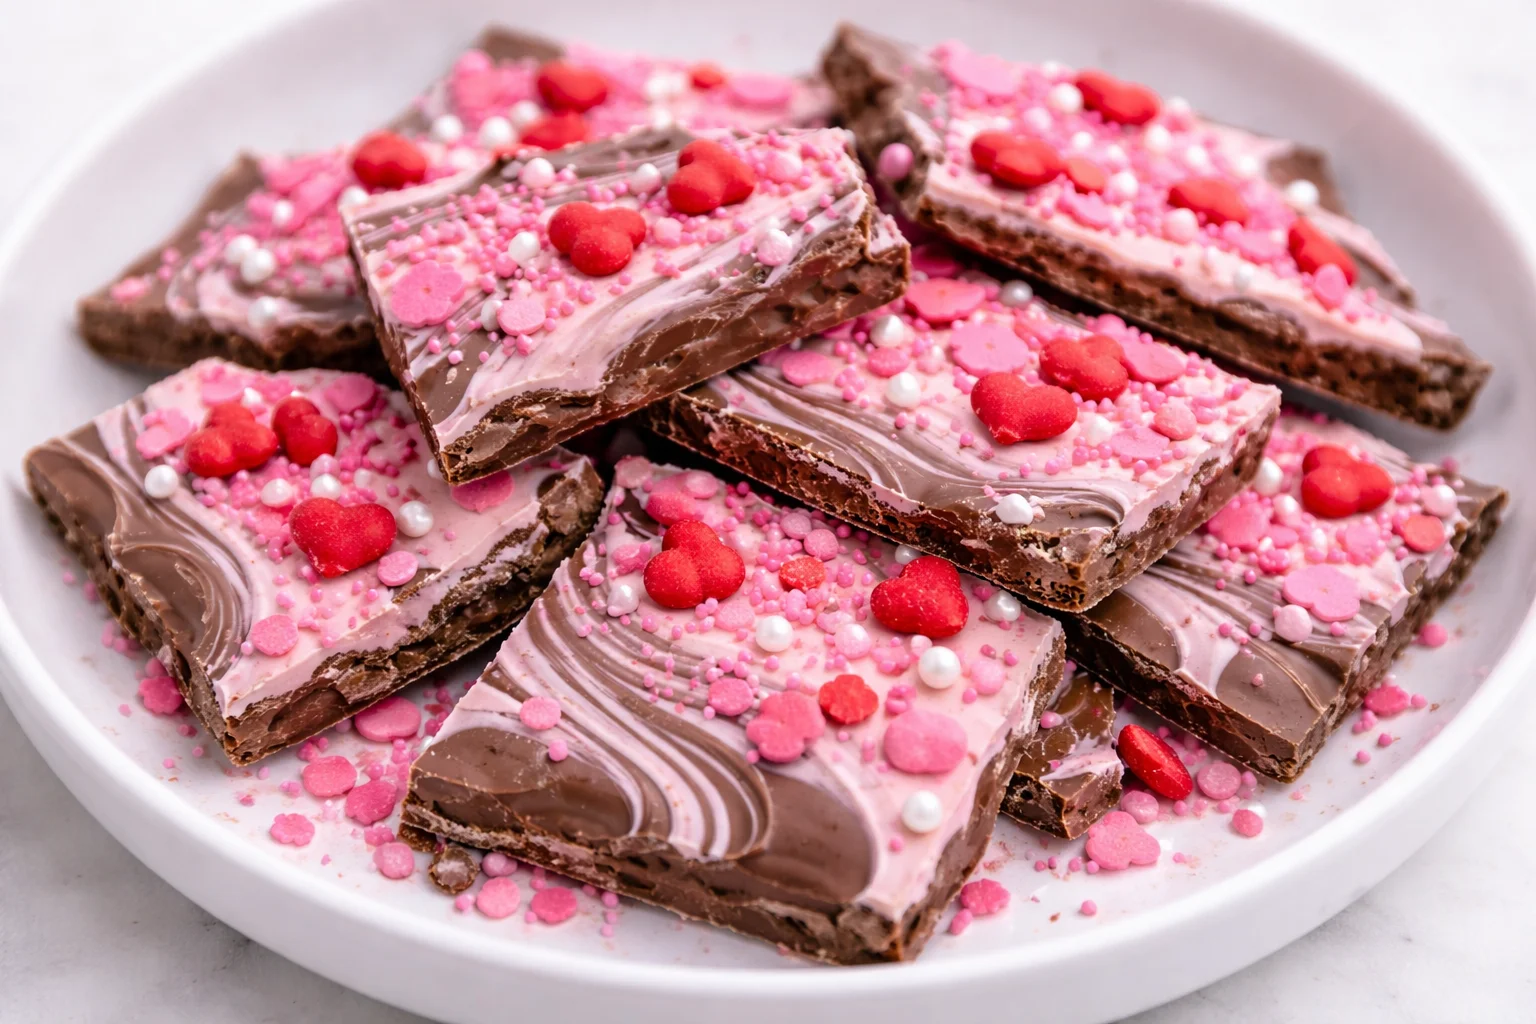
Allow the chocolate to set at room temperature. If you’re in a hurry, refrigerate it until firm—about 20-30 minutes does the trick! Once hard, break the chocolate bark into pieces, and it’s ready to serve. Each piece will reveal a bit of marbled magic just waiting to be enjoyed!
Fun Variations You Can Try
One of the best parts about chocolate bark is how easy it is to customize. Feel free to switch things up and make it your own! Here are some fun variations you can experiment with:
- Nutty Delight: Add in chopped nuts such as almonds, walnuts, or peanuts for added crunch and flavor.
- Dried Fruits: Incorporate dried fruits like cranberries, cherries, or apricots for a chewy balance alongside the rich chocolate.
- Flavored Extracts: Stir in a few drops of peppermint or almond extract in the melted chocolate for a unique twist.
- Different Color Melts: Swap out the pink candy melts for other seasonal colors like red, green, or orange for different festive occasions.
- Spicy Kick: Add a pinch of cayenne pepper or chili powder to the semi-sweet chocolate for an unexpected spicy twist!
Feel free to mix and match based on what you have on hand or what flavors you love most. Each variation will lend a new personality to your chocolate bark!
How I Love to Serve It
Presentation matters, especially when it comes to sharing an indulgent treat like chocolate bark. I love to arrange the broken pieces artfully on a large, decorative platter, perhaps dusting it with a sprinkle of cocoa powder or sea salt for an elegant touch. The contrast in colors catches the light beautifully and makes for a perfect centerpiece at gatherings.
Pair this chocolate bark with a hot beverage. It goes wonderfully with warm cocoa, chai tea, or a cozy cup of coffee. Plus, it serves as a great sweet gift or a token of appreciation for friends and family.
When serving, I like to place a few pieces in small treat bags tied with pretty ribbons for an added personal touch when gifting them. Such little details just make the heart swell!
Helpful Tips from My Kitchen
To ensure your chocolate bark turns out perfectly every time, keep the following tips in mind:
- Quality Chocolate: Use good quality chocolate. The better the chocolate, the better your bark will taste. Aim for high-quality, premium brands when selecting your chocolate chips and melts.
- Temperature Matters: Make sure not to overheat your chocolate—it can become grainy if cooked too long. Stirring in between intervals helps prevent this.
- Line Your Pan: Always line your baking sheet with parchment paper to make removing the chocolate bark a breeze once it sets.
- Storage: Store any leftover chocolate bark in an airtight container at room temperature. This will keep it fresh and delicious longer.
- Encourage Creativity: Don’t shy away from experimenting! This is a forgiving recipe, and you can adjust flavors and components as you wish.
Each step becomes easier once you get the hang of it, and you’ll find yourself creating beautiful batches of chocolate bark that everyone will love!
Important Cooking Reminders
- Safety First: Be cautious when melting chocolate. Avoid getting water in it, as it can seize up and become unusable.
- Storage Tips: Store any leftovers in an airtight container away from light in a cool place. Chocolate can bloom if stored improperly.
- Reheating: If your chocolate cools and hardens, you can melt it again gently using a microwave at a low power to soften it.
- Common Mistake: A frequent error is overcooking the chocolate. Always check every 30 seconds while melting, ensuring it maintains a smooth consistency.
By being mindful of these reminders, you can enjoy a successful chocolate-making experience each time!
Nutritional Information (Estimated)
Indulging in a treat like chocolate bark doesn’t mean you have to feel guilty. Here’s a breakdown of its nutritional information per serving:
- Calories: Approximately 150 calories per piece.
- Carbs: 18 grams of carbohydrates.
- Fat: Roughly 9 grams of fat.
- Protein: About 2 grams of protein.
While these figures can vary based on specific brands and portion size, this delightful treat can fit into a balanced lifestyle when enjoyed in moderation.
Recipe Details
- Prep Time: 15 minutes
- Cook Time: 5 minutes
- Total Time: 20 minutes
- Yield: About 12 pieces
Common Questions You Might Have
How long will the chocolate bark last?
Chocolate bark can last for about 2 weeks when stored properly in an airtight container at room temperature. If it’s warm in your kitchen, consider keeping it in the refrigerator to preserve freshness.
Can I use gluten-free ingredients?
Yes! The ingredients listed are gluten-free, but always check the packaging to ensure no cross-contamination occurs during manufacturing. You can also explore using gluten-free candy melts.
What if I have allergies?
Feel free to substitute ingredients to accommodate allergies. Use dairy-free chocolate chips and toppings if you are avoiding dairy, or consider nut-free options if nuts are a concern.
This chocolate bark is versatile and can fit various dietary needs with a little creativity!
Conclusion
Creating homemade treats like this Valentine’s Day Chocolate Bark ignites a warmth that resonates deeply. There’s something unique about mixing simple ingredients and transforming them into something memorable—each piece is filled with care, creativity, and love. As you bite into the rich chocolate, you may find it reminds you of kitchen moments spent with loved ones, each bite taking you back to laughter and joyous gatherings.
Whether you are celebrating Valentine’s Day, marking a special occasion, or just looking to indulge a little, this recipe brings comfort and cheer. As you share this delightful creation with those you hold dear, know that you are more than just providing a treat; you are offering a slice of joy and a heartfelt expression of love. Enjoy the process, the flavors, and the moments of togetherness as you craft this delicious chocolate bark!
Print
Valentine’s Day Chocolate Bark
- Total Time: 20 minutes
- Yield: 12 pieces 1x
- Diet: Vegetarian
Description
Indulge in this simple yet delightful Valentine’s Day Chocolate Bark, combining rich semi-sweet and creamy white chocolate with festive sprinkles for a sweet treat perfect for sharing.
Ingredients
- 2 cups semi sweet chocolate chips
- 1 cup white chocolate chips
- ½ cup pink candy melts
- ½ cup Valentine’s sprinkles
Instructions
- Heat the semi-sweet chocolate chips in a microwave-safe bowl in 30-second intervals, stirring until smooth.
- Pour the melted chocolate onto a parchment-lined baking sheet and spread evenly.
- Melt the white chocolate chips in the same manner, then drizzle over the semi-sweet layer.
- Repeat the melting process for the pink candy melts and drizzle over the layered chocolates.
- Swirl the chocolates together using a toothpick or knife for a marbled effect.
- Sprinkle Valentine’s sprinkles on top before allowing the chocolate to set at room temperature or in the refrigerator for 20-30 minutes.
- Once firm, break into pieces and serve.
Notes
Feel free to customize with nuts, dried fruits, or flavored extracts according to your taste preferences.
- Prep Time: 15 minutes
- Cook Time: 5 minutes
- Category: Dessert
- Method: Microwaving
- Cuisine: American
Nutrition
- Serving Size: 1 piece
- Calories: 150
- Sugar: 10g
- Sodium: 50mg
- Fat: 9g
- Saturated Fat: 5g
- Unsaturated Fat: 3g
- Trans Fat: 0g
- Carbohydrates: 18g
- Fiber: 1g
- Protein: 2g
- Cholesterol: 5mg
Keywords: chocolate bark, dessert, Valentine's Day, homemade treats, easy recipe