
I love the kind of kitchen nights where the oven hums and the whole house smells like butter and comfort. Tonight’s memory is of little hands picking flaky golden tops and the cozy sound of spoons scraping warm, creamy filling. Mini Chicken Pot Pies are the kind of recipe that feels like a hug on a plate and brings everyone to the table without fuss. I first made these on a rainy afternoon when pantry staples and a frozen bag of veggies saved dinner, and now they are my go-to when I want something nostalgic, quick, and homey.
I also joke that these turn leftovers into a celebration. If you like rustic fare and straightforward recipes, you might enjoy pairing them with a simple green salad or those silky roasted baby potatoes I love to spoon over with creamy garlic sauce from time to time here. This piece will walk you through every detail so you can make these at home with confidence and joy.
Kitchen Essentials You’ll Need
A few well-chosen tools make these tiny pies effortless. You do not need a long list, but having the right pieces makes the process faster and cleaner.
- A standard 12-cup muffin pan for shaping and baking the biscuit crusts.
- A sturdy mixing bowl for combining the filling.
- A rolling pin or the flat bottom of a glass to flatten biscuits evenly.
- A spatula or wooden spoon for folding the filling together.
- Measuring spoons for seasonings.
- Oven mitts and a cooling rack for safe handling.
Why they matter: the muffin pan keeps each pie neat and portable. The rolling pin ensures even thickness so the biscuits bake uniformly. A large mixing bowl gives you room to stir without spills. These are small investments that return big on comfort and presentation.
Why You’ll Love This Mini Chicken Pot Pies
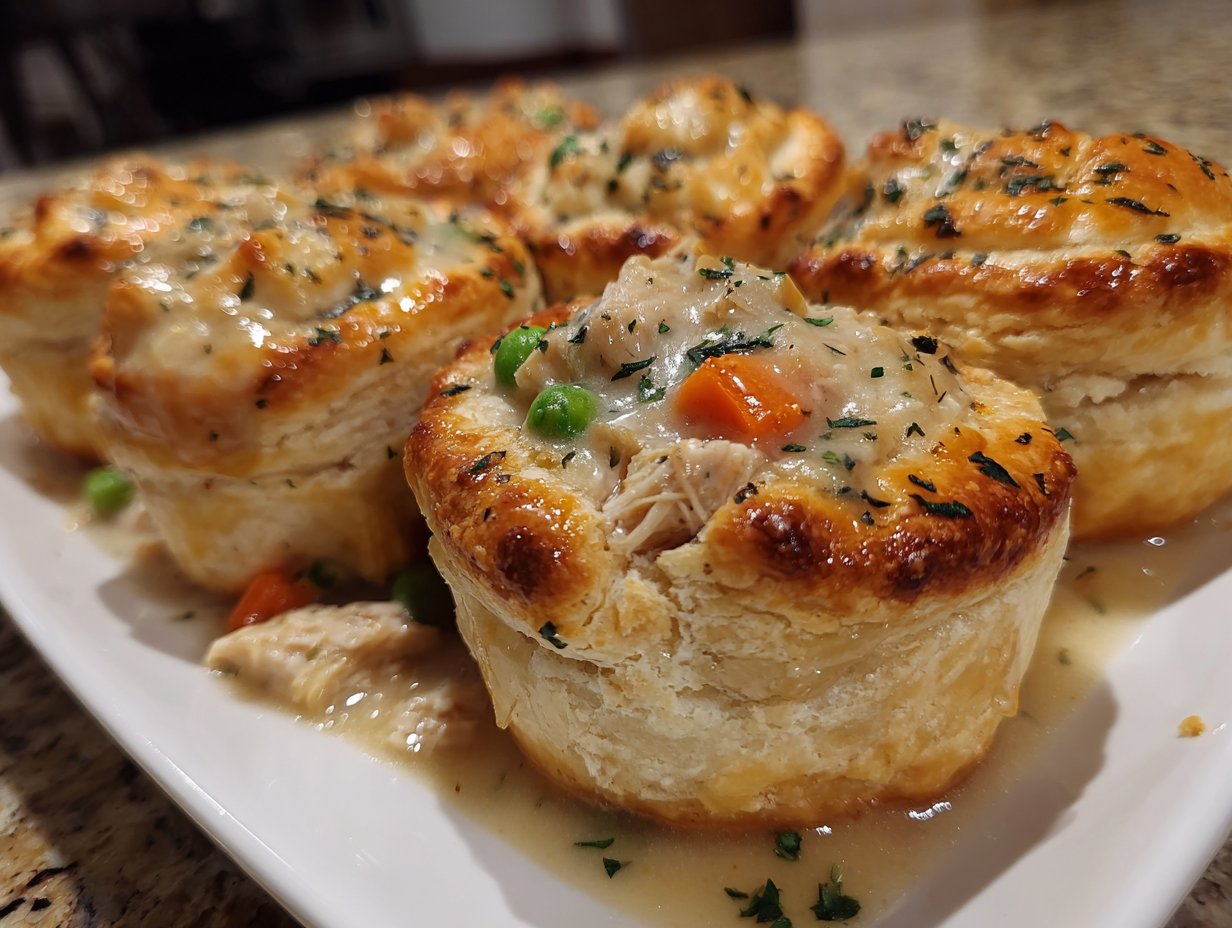
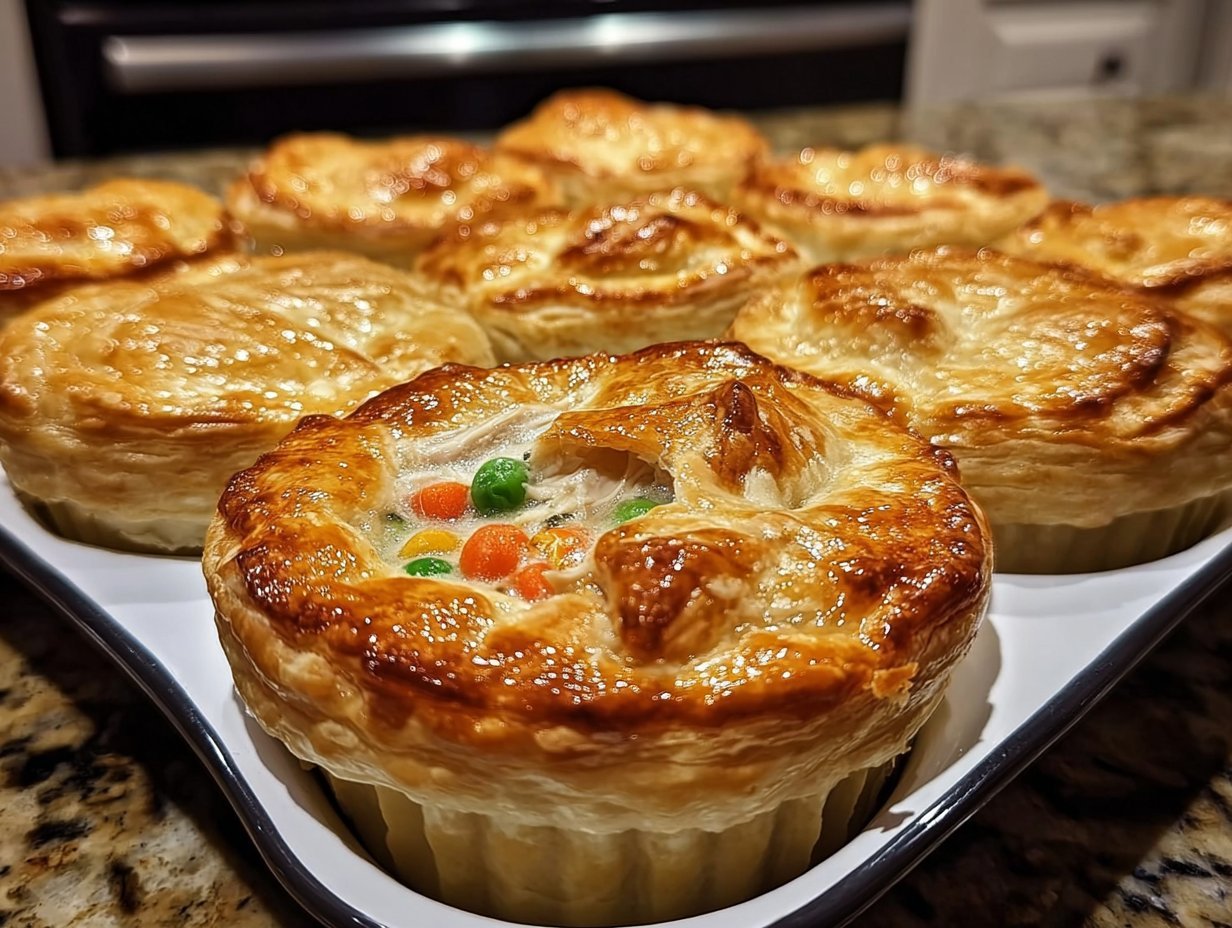
There is something deeply comforting about a warm crust that cracks gently under a fork to reveal a creamy, savory filling. These Mini Chicken Pot Pies are all about texture and memory. The biscuits bake up flaky and golden while the inside stays soft and saucy, studded with tender chicken and bright bits of vegetables.
- Flavor: The cream of chicken soup gives instant richness and savory depth, while a touch of garlic and onion powder layers in warmth without fuss.
- Texture: Flaky biscuit walls, silky filling, and the popping tenderness of thawed mixed veggies creates a forkful that is satisfying every time.
- Convenience: Pantry staples and canned goods mean you can throw these together on a busy weeknight. They are also perfect for feeding a crowd or packing into lunches.
- Emotional comfort: Each little pie is like a cozy, edible bowl of home. They are perfect for evenings when you want to feel grounded without a lot of effort.
The aroma while baking is a big part of the appeal. As the edges brown, the kitchen fills with buttery biscuit notes and the gentle, savory scent of chicken and herbs. The first bite is warm and forgiving, perfect for a chilled evening, a small celebration, or a simple family supper.
Mini Chicken Pot Pies Ingredients
2 cans flaky layers biscuits, 2 cans cream of chicken soup, 2 cans cooked chicken or 2 cups fresh, cooked chicken, shredded, 1 bag frozen mixed vegetables, thawed, Salt, Pepper, Garlic powder, Onion powder, Olive oil or butter for sautéing
Beyond this core pantry-friendly list, you might have these on hand and use them as needed: a splash of chicken broth to thin the filling if desired, a sprinkle of dried thyme or parsley for brightness, and grated cheddar if you like a cheesy finish. Keep everything prepped and within reach. The simple ingredient list is one reason these pies are such a weekday hero; the flavors are familiar and forgiving, and the technique is forgiving too.
Step-by-Step Instructions
- Preheat your oven to 400°F (200°C).
- In a large bowl, combine the cream of chicken soup, shredded chicken, and thawed mixed vegetables. Season to taste with salt, pepper, and any favorite herbs. Stir until well combined.
- Open the cans of biscuits and flatten each one to about ¼ inch thick.
- Press each flattened biscuit into the cups of a muffin pan, covering the bottom and sides.
- Fill each biscuit crust with the chicken, veggie, and soup mixture, filling them about three-quarters full.
- Bake in the preheated oven for 20 minutes or until the biscuits are golden brown and the filling is hot and bubbly.
- Allow to cool for a few minutes before carefully removing from the pan. Serve warm.
- As the oven preheats, take notice of the biscuit texture when you press them into the pan. They should feel supple and even. If a biscuit seems too thick at the rim, gently press it down until the thickness is uniform.
- When scooping the filling, look for a creamy consistency that clings slightly to the spoon. If the filling seems too thick, stir in a tablespoon of warm chicken broth to loosen it; if too thin, a quick minute back on the stovetop will thicken it gently.
- During baking, watch for the color of the biscuits. A deep golden edge and a slightly browned top signal that the crust is flaky and done. The kitchen will release a warm, savory aroma when the filling starts to bubble.
- After removing from the oven, let the minis rest for about 5 minutes. This short cooling time lets the filling set so the pies come out cleanly and maintain their shape. Use a small offset spatula or a butter knife to loosen edges if needed.
- Serve warm, enjoying the contrast between the crisp, buttery top and the cozy, spoonable center.
Fun Variations You Can Try
- Swap the cream of chicken for cream of mushroom for an earthier, deeper flavor.
- Use biscuit dough cut slightly thinner and top with a sprinkle of parmesan for extra crispness.
- Make a turkey version with leftover holiday meat and a handful of dried cranberries for a sweet-savory twist.
- Add spices: smoked paprika and a pinch of cayenne give a warm, slightly smoky kick.
- Vegetarian option: replace chicken with a can of drained chickpeas and a splash of vegetable broth; finish with a handful of shredded cheese if you like.
- Make them mini-meal friendly by using smaller muffin tins for bite-sized appetizers.
These tweaks keep the spirit of the dish while letting you tailor it to seasonal ingredients or dietary needs. The method is forgiving, so small ingredient swaps generally work well.
How I Love to Serve It
I love arranging these little pies on a simple platter so everyone can help themselves. They pair beautifully with crisp, acidic sides that cut through the richness. Think bright, peppery arugula with lemon vinaigrette or a crunchy cabbage slaw tossed with apple and carrot.
Serve them with:
- A light green salad dressed with lemon and olive oil.
- Steamed green beans tossed with butter and lemon zest.
- A bowl of roasted baby potatoes or those mini potatoes topped with a creamy garlic sauce for extra indulgence.
For a cozy dinner, I set the table with warm napkins and let the pies sit on a trivet. The atmosphere is casual and intimate. Sometimes I place a little ramekin of extra warmed cream soup at the table for those who like their pies saucier. This meal feels gentle and comforting, perfect for evenings when you want food that hugs you back.
Helpful Tips from My Kitchen
- Prep ahead: assemble the filling and refrigerate it for an hour. The flavors meld and the chilled filling is easier to spoon into the biscuit shells.
- Even thickness: flatten the biscuits evenly so they bake at the same rate. I like to press from the center out to avoid thin spots.
- Seasoning matters: taste the filling before filling the crusts. Canned soup is salty, so add salt carefully. A dash of black pepper, garlic powder, and a whisper of onion powder go a long way.
- Texture control: if you want a silkier filling, stir in a splash of cream or broth. For a thicker filling, simmer it briefly on the stove to reduce.
- Nonstick and cleanup: spray the muffin pan lightly with oil or butter to ensure easy release and easier cleanup.
- Filling temperature: avoid piping piping-hot filling into raw biscuits. Let it cool slightly so the biscuit dough bakes through without burning on the outside.
- Leftovers: cool completely and store in an airtight container for up to 3 days in the fridge. Reheat gently at 350°F for about 10 minutes or until warmed through.
And if you ever want another fuss-free chicken recipe for an easy weeknight, I often turn to a slow-cooked favorite that gives a different kind of comfort and uses similar pantry staples here.
Important Cooking Reminders
- Always use oven mitts when removing the muffin pan to avoid burns.
- Reheating: bake leftovers at 350°F (175°C) for about 10 minutes or until warmed through. A quick turn under the broiler for a minute can re-crisp the tops but watch carefully.
- Storage: refrigerate cooled pies within two hours. Keep in an airtight container for up to 3 days.
- Freezing: assemble and flash-freeze on a baking sheet, then store in freezer bags for up to one month. Reheat from frozen at 375°F (190°C) for 20–25 minutes, loosely covered with foil, until heated.
- Common mistakes to avoid:
- Overfilling the biscuit cups. Leave room for bubbling.
- Skipping the rest time. Letting them sit a few minutes prevents the filling from spilling.
- Using frozen vegetables straight from the freezer. Thawing reduces excess water and prevents a soggy filling.
Nutritional Information (Estimated)
These are rough estimates for one mini pot pie depending on portion size and the exact products used. Calories will vary with added butter or cheese. Generally, each mini pie ranges around 280–360 calories. Carbs are moderate, largely from the biscuit crust, typically 20–30 grams. Fat comes from the biscuit and soup base and lands near 12–18 grams. Protein is satisfying thanks to the chicken, often around 12–20 grams per pie. If you need precise numbers for dietary reasons, measure your specific ingredients and consult a nutrition calculator.
Recipe Details
- Prep Time: 15 minutes
- Cook Time: 20 minutes
- Total Time: 35 minutes
- Yield: About 8–12 mini pot pies depending on biscuit count
Common Questions You Might Have
What can I use instead of canned cream of chicken soup? You can substitute a homemade white sauce made with butter, flour, and chicken broth. Simmer equal parts butter and flour to form a roux, gradually whisk in warmed chicken broth and a splash of milk until thick. Season with salt, pepper, and onion powder. This option reduces sodium and allows control over richness.
Can I make these ahead for a party? Yes. Assemble the pies and refrigerate for up to 24 hours before baking. For longer prep, freeze them on a tray, then transfer to a freezer bag. Bake from frozen at a slightly higher temperature and add a few extra minutes to ensure the filling is heated through. Place a sheet of foil over them if the tops brown too quickly.
How do I prevent soggy bottoms? Thaw and drain the mixed vegetables well. Slightly cool the filling before spooning into the biscuit shells. Lightly pre-bake the biscuit cups for 3–4 minutes if you are worried about underbaked bottoms. Also avoid over-filling so steam can escape and the crust can crisp.
Conclusion
These Mini Chicken Pot Pies are the kind of recipe that arrives at your table with warmth and simplicity. The buttery biscuit crusts and the velvety, savory filling make for a comforting bite that feels like home. I love how they transform humble pantry items into something special, and I hope they become a quiet favorite in your kitchen too. Whether you are feeding family on a busy weeknight or bringing something homemade to a neighbor, these pies carry a gentle, reassuring flavor that comforts without ceremony. Remember the little joys: the golden top, the soft filling, the way the house smells as the oven works. Keep the technique simple, trust your seasoning, and enjoy the way this recipe wraps the everyday in a flaky, warm crust. Mini Chicken Pot Pies are a small, satisfying tradition you can make again and again, and each batch brings a soft, delicious memory to your table.
Print
Mini Chicken Pot Pies
- Total Time: 35 minutes
- Yield: 8–12 mini pot pies 1x
- Diet: Poultry
Description
Delicious mini chicken pot pies with flaky biscuits and creamy filling, perfect for cozy nights.
Ingredients
- 2 cans flaky layers biscuits
- 2 cans cream of chicken soup
- 2 cans cooked chicken or 2 cups fresh, cooked chicken, shredded
- 1 bag frozen mixed vegetables, thawed
- Salt
- Pepper
- Garlic powder
- Onion powder
- Olive oil or butter for sautéing
Instructions
- Preheat your oven to 400°F (200°C).
- In a large bowl, combine the cream of chicken soup, shredded chicken, and thawed mixed vegetables. Season to taste with salt, pepper, and any favorite herbs. Stir until well combined.
- Open the cans of biscuits and flatten each one to about ¼ inch thick.
- Press each flattened biscuit into the cups of a muffin pan, covering the bottom and sides.
- Fill each biscuit crust with the chicken, veggie, and soup mixture, filling them about three-quarters full.
- Bake in the preheated oven for 20 minutes or until the biscuits are golden brown and the filling is hot and bubbly.
- Allow to cool for a few minutes before carefully removing from the pan. Serve warm.
Notes
These mini pot pies are great for leftovers and can be made ahead. Feel free to customize by adding herbs or spices. Adjust filling and baking for desired texture and flavor.
- Prep Time: 15 minutes
- Cook Time: 20 minutes
- Category: Main Course
- Method: Baking
- Cuisine: American
Nutrition
- Serving Size: 1 mini pot pie
- Calories: 320
- Sugar: 2g
- Sodium: 600mg
- Fat: 16g
- Saturated Fat: 5g
- Unsaturated Fat: 9g
- Trans Fat: 0g
- Carbohydrates: 32g
- Fiber: 2g
- Protein: 14g
- Cholesterol: 45mg
Keywords: chicken pot pie, comfort food, easy recipe